CPSC 120, Fall 2011
Lab 1: Introduction to HTML and CSS
Welcome to the first lab for CPSC 120. In this lab, you will create your first web pages. You will also be introduced to the Linux operating system and to the main development environment that you will use for the rest of the semester.
As you work through the instructions for the lab, there are likely to be things that you don't understand. Ask for help! You are also encouraged to come in for help during office hours.
You are not expected to complete the lab during class. You should complete all the assignments before class next Friday. The work that you do will automatically be stored in a location to which I have access, and you do not have to do anything special to submit it. I will make a copy of your work, to be used for grading, just before the beginning of lab next week.
Next week, I will show you how to publish your work so that it is visible on the Web. (Note: You should never publish your work until I have made a copy for grading.)
Getting into Linux and Aptana Studio
The computers in Gulick 208 are usually running the Windows operating system, but they are also set up to run Linux. To get into Linux, restart the computer. (You can do this using the small "power button" menu on the bottom-right of the login screen.) As the computer restarts, there is a point where are given a choice between Windows and Ubuntu. Press the down-arrow key to select Ubuntu, and press return. You only have about ten seconds to do this. After a few minutes, you will see a Linux login screen. ("Ubuntu" refers to Ubuntu Linux.)
Log in using the Linux user name and password that were assigned to you. (Your Linux user name is the same as your user name for the Windows network, but the password is different.) Your Linux desktop will have an "Applications" menu at the top-left of the screen. You can explore some of the applications there, when you have time. For now, you should select "Aptana Studio 3" from "Applications/Other". Aptana Studio is the development environment that you will use for writing Web pages.
The Aptana Studio window is divided into sections, and some sections have tabs that let you select different things for display. The left panel shows the "App Explorer". You want it to show the "Package Explorer", which is in another tab in the left panel. You should close the "App Explorer" by clicking the small "×" next to its name.
Your work in Aptana Studio is organized into "Projects". A Project is a collection of files, including HTML source code files for web pages and supporting files such as images and CSS style sheets. To start a project, select "Web Project" from the "File/New" submenu. A dialog box will pop up, where you can enter a name for the project. For this week, enter Lab 1 as the name of the project, and click "Finish".
(Your files are actually stored in a folder named "Aptana Studio 3 Workspace". If you want to investigate it, select "Home Folder" from the "Places" menu at the top of the screen. I have access to the files in this folder, so that I can collect them for grading.)
Note about leaving Aptana and Linux: When you are done working, you can quit Aptana Studio by selecting "Exit" from the "File" menu. Before leaving the lab, you should restart the computer, so that it will boot back into Windows. To restart the computer, you can select "Shut Down" from the "System" menu at the top of the screen, then click on "Restart" in the dialog box that appears. Do not shut down the computer, and do not leave it running Linux.
Creating and Viewing an HTML File
To start writing a new web page, right-click the name of the project ("Lab 1") in the Project Explorer panel. In the pop-up menu, go to "New", and select "File" from the sub-menu. Fill in the file name, and click "Finish". For an HTML page, the file name must end with ".html", and the file name should not include any spaces or funny characters.
The new file will open in the large center panel of the window. This panel is where you do all your typing. It can contain several open files at once, with tabs along the top to select among the open files. The file will also be listed in your project in the "Project Explorer" panel; you might have to click on the small triangle next to the project name to see the file.
You should enter the outline of a basic HTML page, something like the following:
<html>

<head>
<title>Lab1: First Web Page</title>
</head>

<body>

<h2>About Me</h2>

<p>Here's all you need to know about me...</p>

</body>
</html>
Note: Sometimes as you type, you'll see a small yellow warning symbol
(![]() ) in the
left margin of the editor panel. This symbol marks a possible error in your
HTML code. Sometimes the error will go away, and sometimes it's not really
an error (since the computer is not really all that smart). But sometimes,
the warning is about a real error in your code. To see an error message,
you can hover your mouse over the warning symbol for a couple seconds.
Sometimes, you might see a more definite error marked with a red error symbol
(
) in the
left margin of the editor panel. This symbol marks a possible error in your
HTML code. Sometimes the error will go away, and sometimes it's not really
an error (since the computer is not really all that smart). But sometimes,
the warning is about a real error in your code. To see an error message,
you can hover your mouse over the warning symbol for a couple seconds.
Sometimes, you might see a more definite error marked with a red error symbol
(![]() ).
).
You probably also noticed that as you type, the editor will often pop-up a window containing a list of possible completions for what you are typing. You can press return to insert the selected item, press the up- and down-arrow keys to move the selection, or press Escape to close the list. You can also insert an item by double-clicking on it. This feature of Aptana Studio is called content assist. If you don't see a list of completions where you expect one, you can try invoking content assist by hitting Control-Space.
To see your web page in a Web browser, you can right-click in the editor
panel, go to the "Run As" submenu, and select "Javascript Web Application."
Alternatively, you can choose the "Run" command from the "Run" menu, or you
can click the small Run button (![]() ),
but these two methods can't always tell exactly which file you want to run.
),
but these two methods can't always tell exactly which file you want to run.
Adding Style
As you know, the HTML code for a web page specifies the content of the page. To add style, you can use CSS. One way to use CSS is to add a <style> section to the <head> of the HTML file. For example, add the following code to your HTML file (and remember to put it inside <head>):
<style type="text/css">
body {
   background-color: #CCCCCC;
}
h2 {
   color: red;
}
</style>
This will make light gray ("#CCCCCC") the background color for the whole page, and will show the text of <h2> elements in red. Experiment with some other styles and colors. (The color chooser web page at http://www.w3schools.com/tags/ref_colorpicker.asp can be helpful in finding appropriate color codes.)
As an example of some of the utilities available in Aptana Studio, when you are about to type a value for a background-color or color, select "CSS/Insert Color" from the "Commands" menu. A dialog will pop up where you can select the color visually.
Adding an Image
To make your page just a little less boring, add an image to the page. To do this, you an image file, such as this one:
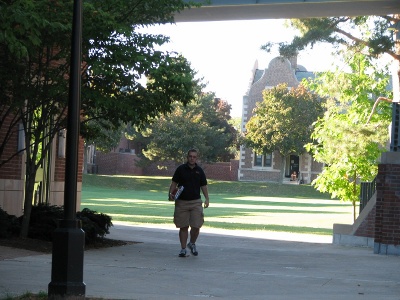
First, you should download the image file. Browse to this page (http://math.hws.edu/eck/cs120/f11/lab1) in a web browser, scroll to the image, right-click the image, and save it to your Desktop. The name of the image file is "the-quad.jpg". (You can substitute a different image, if you want, but make sure that it's not too big and that it is legal for you to post a copy on the web.) Go to the Desktop, right-click the image file's icon, and select "Copy". Go back to the Aptana Studio window, right-click the project name in the Project Explorer panel, and select "Paste". The image file should appear in your project.
To add the image to your web page, you need to add an <img> tag to the HTML code. It's usually a good idea to put images inside <p> tags. Add this code in the <body> of your page, where you want the image to appear:
<p align="center"><img src="the-quad.jpg"></p>
If you are using a different image, just substitute the name of your
image file for "the-quad.jpg". (When you type src=", Content Assist
will pop up a list of images in the project, and you can select the name from that
list.)
Note the use of the "attribute", align="center", in the
<p> tag. This will center the image on the page.
Another Web Page
Now that you've created one web page, it will be easy to create more. As an assignment you should make another web page. To make things definite, you should imagine that you are creating a web page for some organization, or to provide information on some topic, or to support some cause.
Give the page a meaningful title. Add some headlines, paragraphs, and pictures. Apply some CSS to make the page more attractive. As you learn more about HTML and CSS over the course of the next week, add some additional features and styles to the page.
You should also do some additional work on the first page that you created. By next Friday, when the work from this lab is due, both pages should be complete and should be ready to be collected and graded.
Working Outside of Lab
You will need to do a lot of work on your web pages outside of lab. You have several options for working on your own.
- You can work on the computers in the Math/CS lab, Lansing 310. These computers are always running Linux and do not have to be rebooted; otherwise, they work the same as the computers in Gulick 208.
- You can use VNC on your own computer to work remotely on Math/CS computers. See http://math.hws.edu/about_linux/vnc.html for details. This is not an ideal option, since VNC does not provide a great user experience.
- You can use Aptana Studio 3 on some of the Windows and Mac OS computers in the Colleges' computer labs, and you can install this program on your own computer. However, when you do this, your work is not submitted automatically to me, and you will have to learn how to submit your work.
- On a Mac OS computer -- either your own or one in the Colleges' labs --
you can use ssh to connect to the
Math/CS computers and work on them remotely. (You must be on the HWS campus network to do this.)
To use ssh, you must first open a Terminal window.
(On Mac OS, the Terminal application is in the "Utilities" folder inside "Applications".)
In a Terminal window, type in a command of the following form:
ssh -X zz9999@csfacXX.hws.edu
except that you should replace zz9999 with your own user ID, and csfacXX cab be be replaced by any of the csfac computer names: csfac0, csfac1, csfac2, ..., csfac7. The "-X" in this command is essential, since it will allow you to run Aptana Studio and other programs such as Firefox. It must be an upper-case X. The first time you connect to a given computer, you will be asked whether you really want to connect. You should say "yes". You will be asked for a password; use the same Linux password that you use to log into Linux in the lab. Note that the password will not be shown as you type it. Once you have connected successfully, you can type the command
aptana
and press return. You can then forget about the Terminal window, but leave it open. After a while, the Aptana Studio window should open, and you should be able to use it mostly in the same way that you do in lab. Unfortunately, however, you can't copy-and-paste an image from the Mac into Aptana. The interaction will be a little slow, since the program is actually running on another computer, but it should be usable.