CS 120, Fall 2014, Lab 5:
HTML Canvas Graphics
This lab introduces the <canvas> element, a recent addition to HTML that allows JavaScript to draw pictures on a web page. You can expect this lab to work in recent versions of Firefox, Chrome, and Safari. It should work in Internet Explorer 9 or later, but not in earlier versions. The point of the lab is to draw simple pictures using HTML canvas graphics.
The lab is due at the start of class next Friday, as usual.
Protecting Your Work / Starting the Lab
In previous labs, you have worked in the www folder in your account. The things that you put in that folder are visible to everyone in the world, including other people in the class. Now that we are starting more technical programming, I would like you to keep your work private until it is collected. For this lab and future labs, unless told otherwise, you should not share your work with other people in the class. You can get help from TA's and from the professor, and you can discuss the assignments in general terms with other students, but the work you turn in should be your own.
To make this possible, I have added a folder named cs120 to your account, and I have given myself access to that folder. From now on, I will look in your cs120 folder when I collect assignments. After the assignment has been collected, you can copy your work into your www folder, and you can add it to your web portfolio. (You should copy your work into the www folder, not move it; for technical reasons, when you copy a folder into www, it becomes publicly accessible on the web, but if you move an existing folder into www, it does not.)
To start this lab, you should copy the folder named lab5 from /classes/cs120 into the cs120 folder in your own account. You will find a file named first-drawings.html. You should open your copy of that file in Komodo Edit (or gedit if you prefer). All of the work that you do for this lab will be in that file, and I will look for that file when I grade your work. There is also a JavaScript file, graphics120.js, that is used in the HTML document. You need the JavaScript file, but you won't have to edit it.
Graphics Properties and Functions
A <canvas> element on an HTML page represents a rectangular area on which you can draw using JavaScript commands. The drawing is done with a variable named graphics. Actually, you could name the variable anything you want, but my discussion assumes it is called "graphics." The value of graphics is a complex object called a graphics context, and it contains properties and functions that are used for drawing on a canvas. (A property is just a variable that is part of an object.) Note that a graphics context is for drawing on one particular canvas. It's possible to have several canvasses on a page and to have a different graphics context for each one.
The web page that you will work on already defines the graphics variable that you need. This section describes the things that you can do with it.
Canvas graphics works with paths, shapes, strokes, and fills. You can "stroke" a path or the outline of a closed shape such as a rectangle or circle. You can "fill" a closed shape. You can also work with text: The outlines of the characters are considered to be closed shapes, and you can either stroke or fill them.
Graphics Context Properties: The following property variables store values that affect drawing operations, such as color used to fill shapes and the width of strokes. The values affect drawing that is done after you set the value, and it remains in effect until you change the value by assigning a new value to the variable. Variables include:
- graphics.fillStyle — Set the color to be used for fill operations. The value is a string that specifies a CSS color value. You can use color names or color codes with "#". For example: graphics.fillStyle = "red";
- graphics.strokeStyle — Set the color to be used for stroke operations. The value is a string that specifies a CSS color value. For example: graphics.strokeStyle = "#AAB030";
- graphics.lineWidth — Set the width of the lines used for stroke operations. The value is a positive number, and it gives the line width as a number of pixels. For example: graphics.lineWidth = 5;
- graphics.font — Set the font that is used for graphics.fillText and graphics.strokeText. The value is a string specifying a CSS font, which can include styles like italic and bold, size, and font-family. For example: graphics.font = "italic bold 60px monospace"; or graphics.font = "20px sans-serif";
- graphics.globalAlpha — Set the degree of transparency for all drawing operations. The value is a number in the range 0 to 1. The usual value is 1, which gives fully opaque shapes. When the value is less than 1, the shape's colors are blended with the background color so that it looks like the shape is transparent. For example: graphics.globalAlpha = 0.6;
Graphics Drawing Functions: To actually draw something on the canvas, you need to call a drawing function, such as graphics.fillRect(). Many drawing functions have parameters that specify the "coordinates" to be used in the drawing operation. The canvas is made up of rows of columns of "pixels". The width of the canvas gives the number of columns of pixels. The height of the canvas gives the number of rows. A point in the canvas is specified by coordinates (x,y) where x is the number of pixels over from the left edge of the canvas and y is the number of pixels down from the top edge of the canvas. The upper left corner of the canvas has coordinates (0,0). The x-coordinate increases to the right, and the y-coordinate increases downwards. (It's OK to draw figures that lie completely or partly outside the canvas -- you will just see the part the intersects the canvas.) So, here are some of the drawing functions that you can use. Keep in mind that when you use these functions, the actual parameters that you put in the parentheses can be numbers, variables, or even complicated expressions that compute a value.
- graphics.fillRect(x,y,w,h); — fills in the rectangle with upper left corner (x,y), width w, and height h. To make a square, use the same value for w and for h. (w is the horizontal size of the rectangle, and h is the vertical size; w and h must be positive numbers.)
- graphics.strokeRect(x,y,w,h); — strokes the outline of the rectangle with upper left corner (x,y), width w, and height h. To make a square, use the same value for w and for h.
- graphics.clearRect(x,y,w,h); — erases the inside of the rectangle with upper left corner (x,y), width w, and height h. The background of the canvas will show through in that area. This sets pixels in the canvas image to be "transparent," so the background shows through. (When the canvas is first created, all the pixels are transparent.)
- graphics.strokeText(string,x,y); — strokes the outline of each of the characters in a string of text. The first parameter, string, is the string of text, such as: "Hello World". The left endpoint of the string's baseline is at the point with coordinates (x,y). The baseline is the line on which the string rests, so the string extends above and to the right of (x,y), but parts of some characters, such as "y" and "g", can extend below the baseline.
- graphics.fillText(string,x,y); — like graphics.strokeText, but fills in the characters instead of stroking their outlines.
- graphics.strokeLine(x1,y1,x2,y2); — strokes the straight line segment from the point (x1,y1) to the point (x2,y2). Example: graphics.strokeLine(100,50,200,300);
- graphics.strokeCircle(x,y,r); — strokes the outline of the circle with center (x,y) and radius r. Example: graphics.strokeCircle(300,300,100);
- graphics.fillCircle(x,y,r); — fills the circle with center (x,y) and radius r.
- graphics.strokeOval(x,y,r1,r2); — strokes the outline of the oval (ellipse) with center (x,y), horizontal radius r1, and vertical radius r2. Example: graphics.strokeOval(300,300,200,100);
- graphics.fillOval(x,y,r1,r2); — fills the oval (ellipse) with center (x,y), horizontal radius r1, and vertical radius r2.
- graphics.strokePoly( x1,y1, x2,y2, x3,y3, ... ); — strokes the outline of the polygon with vertices (x1,y1), (x2,y2), (x3,y3), ... Can be used with 6 or more parameters. (You don't actually type the "..."; it just means that you can have more actual parameters.) Use 6 parameters to make a triangle. With 8 parameters, you could draw a diamond shape, and 10 parameters for a pentagon. Example: graphics.strokePoly(200,300,600,300,300,100);
- graphics.fillPoly( x1,y1, x2,y2, x3,y3, ... ); — fills the polygon with vertices (x1,y1), (x2,y2), (x3,y3), ... Can be used with 6 or more parameters.
In addition to the drawing functions, I have provided several functions for making random colors and random numbers. The extra functions are not part of the graphics context. They stand on their own. These functions return a value, which should be assigned to a variable or used in an expression:
- randomColor() — Returns a randomly created color. This is meant to be used in an assignment statement such as: graphics.strokeStyle = randomColor();
- randomGray() — Returns a randomly created shade of gray. This is meant to be used in an assignment statement such as: graphics.fillStyle = randomGray();
- randomSpectralColor() — Returns a randomly created color, which is one of the "colors of the spectrum." Spectral colors are bright, saturated colors. For example, pink, brown and gray are not spectral colors. This is meant to be used in an assignment statement such as: graphics.strokeStyle = randomSpectralColor();
- randomInt(A,B) — Returns a randomly created integer in the range A to B inclusive. For example, randomInt(4,7) returns one of the numbers 4, 5, 6, or 7. This is meant to be used in an assignment statement such as: graphics.lineWidth = randomInt(4,10);
Drawing Random Things
Note that some of the functions described above create random values. JavaScript has one built-in function for making random numbers: Math.random(). The value of Math.random() is a random decimal number between 0 and 1 (including 0 but not including 1). My functions use Math.random() behind the scenes, but they make random colors or random integers instead of random decimals. You can use them in drawing. For example, if you want to put a circle at a random position in a 800-by-600 canvas, you need a random number in the range 0 to 799 for the x-coordinate of the center and a random number in the range 0 to 599 for the y-coordinate of the center. For example:
var x,y;
x = randomInt(1,799);
y = randomInt(1,599);
graphics.strokeCircle( x, y, 50 );
Of course, you could choose the radius at random too. And you might make the width of the stoke random as well by saying for example
graphics.lineWidth = randomInt(2,7);
You can use random colors in a similar way. For example, to fill the canvas with a random bright color, you would say
graphics.fillStyle = randomSpectralColor();
graphics.fillRect(0,0,800,600);
You are only limited by your imagination. For one more example, if you assign Math.random() to graphics.globalAlpha, you get a random amount of transparency.
Drawing Many Things
We saw in class how to use a for loop to repeat some instructions over and over. When you combine this ability with graphics, you can draw more complicated pictures. For example, you could have 500 randomly colored circles at random positions:
var i, x, y;
for (i = 1; i <= 500; i++) {
    x = randomInt(1,799);
    y = randomInt(1,599);
    graphics.fillStyle = randomColor();
    graphics.fillCircle(x,y,50);
}
A for loop uses a variable for counting. You can use the value of that variable in the instructions inside the loop. This can be used to draw more regular pictures. For example, suppose you want a grid of horizontal and vertical lines:
var x, y;
for ( x = 10; x < 800; x = x + 10) {
    graphics.strokeLine( x, 0, x, 600 );
}
for ( y = 10; y < 600; y = y + 10) {
    graphics.strokeLine( 0, y, 800, y );
}
Try it, see what it does, and figure out exactly how it works!
Exercises
The following exercises are to be done in the file first-drawings.html. You can change the size of the canvas in that file, if you want. My examples below were drawn on a square canvas. Note that at the start of each exercise, you should clear the canvas or fill it with color. Otherwise, you will just be drawing on top of the previous picture.
Exercise 1. Replace the instructions inside the function draw1() to draw a reasonably complex picture of your own. Put some effort into it! Try to draw a picture of something real, such as a snowman, a house, a sailboat, or a spaceship. (It will, of course, be a very cartoonish picture.) Use at least a dozen drawing commands, and use several colors. You should draw at least one string in your picture. You might want to use graphics.fillRect() to draw sky and ground in different colors. Do not use any randomness or for loop in this first drawing.
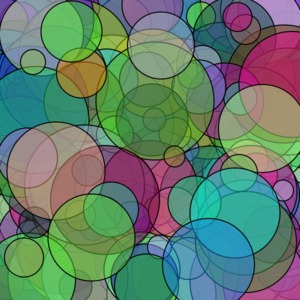
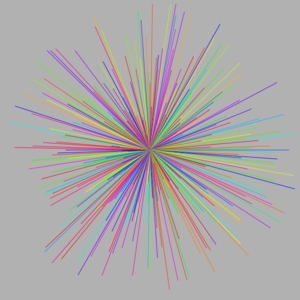
Exercise 2. For the second exercise, you should add a second button to first-drawings.html, and you should write a new function for that button to call. The second function should draw a picture that uses randomness and one or more for loops. But for this exercise, only draw lines. Try to make something that looks like abstract art! For example, draw a large number of lines with randomly chosen endpoints and with random colors. Or use the center of the canvas for one endpoint, and make the other endpoint random. Or use use vertical and/or horizontal lines with random widths. Consider using transparency, if it looks good.
Exercise 3. Add a third button and a third function, and use the third function to draw another work of random art using one or more for loops. You can use one kind of shape or a mixture. You might even use text. But don't make the entire picture from lines (and don't just copy the above code for drawing random circles!).
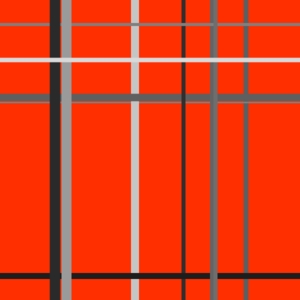
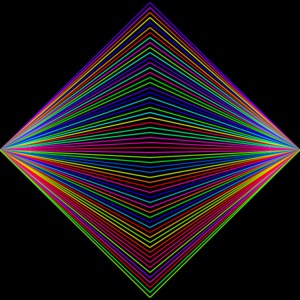
Exercise 4. Finally, add a fourth button and a fourth function. You should use at least one for loop, but for this exercise, you should use the for loop variable when drawing the picture. By using the for loop variable, you can draw some kind of regular or repeating pattern, like the grid example above. (But don't just copy that example!)
Grading will be based partially on ambition and aesthetics. You can do more than four drawings if you want. There might even be extra credit for especially nice art!
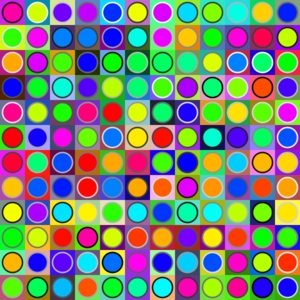
Art Examples
Here are samples of possible "art". You are not required to duplicate these particular types of "art", but you might get some ideas from them. I would be happy to discuss the techniques that I used. The last two would be appropriate for Exercise 4. The last one shown here would be more difficult for you; it uses something called "nested for loops" where you have one for loop inside another.
One final note: If you look at your web page in Firefox, you can right-click the canvas and select "View Image." This will open your image in a new tab or window. You can then save the image by right-clicking and selecting "Save Image As".
 |
 |
 |
 |
 |
 |