NetBeans is an Integrated Development Environment that has nice support for developing Web applications. You will find it to be very similar to Eclipse, but with not quite as many features. In fact, it's similar enough to Eclipse that you will need very few instructions to get started with it. While NetBeans is mostly meant for server-side web programming, it also has error-checking and code completion for HTML, CSS, and JavaScript; this might make it worth using even for client-side programming.
NetBeans did not make it into the Start menu on our lab machines. To make it easy to start up, open the directory /classes/s09/cs271 in a window, and drag the "NetBeans 6.5" icon onto your Desktop (choosing "Copy Here" from the pop-up menu). You can start NetBeans by clicking this icon. Alternatively, you could drag the icon into the panel on the bottom of the screen.
You can download NetBeans for use on your own computer from the web page http://www.netbeans.org/downloads/. You want to get the "Java" download bundle, which has support for "Java Web and EE". This download includes the Tomcat server, but Tomcat is not part of the standard installation. To install Tomcat on your machine, you have to click the "Customize..." button in the installer and select Tomcat.
Start NetBeans. When the NetBeans window opens, you'll see a Start Page with lots of information and links. You can safely close this. On the left, is a "Projects" pane where your NetBeans projects will be listed.
Some configuration: To make sure that NetBeans will use Firefox to display your web pages, go to the "Options" command in the "Tools" menu. Make sure that the "General" tab is displayed, and select "Firefox" from the list of web browsers. If, like me, you are annoyed when a ContentAssist window pops up automatically, go to the "Editor" tab, and under General / Code Completion, turn off the option "Auto Popup Completion Window". You can still use Control-Space at any time to call up ContentAssist. You might want to look around for other options to change later.
To start a new project, you can either right-click in this pane or use the "File" menu, and choose the "New Project" command. You will see a dialog where you can select the type of project. Choose "Java Web" and "Web Application" and click "Next." In the next screen, enter a name for the application, such as "lab1". Click "Next" again, and under "Server", select "Apache Tomcat 6.0.18". (This is the server that will be used to run your project. It is not the default, but once you have changed it for one project, NetBeans should remember the choice so that you won't have to set it again in future projects.) Click "Finish" to close the dialog box and create the project. It should appear in the "Projects" page on the left side of the NetBeans window. The actual files will be stored in a directory named "NetBeansProjects" in your home directory (unless you changed this in the project creation dialog). Note that NetBeans, unlike Eclipse, does not have a concept of "workspaces"; you can store projects anywhere you want.
A file named "index.jsp" will open in the editor pane. This is the home page for the application that you are writing. It is a JSP page, which means that it is meant to contain server-side Java code as well as client-side stuff like HTML, CSS, and JavaScript. To see some JSP action, add this line to the <body> of the page:
<p>2 + 2 = <%= 2 + 2 %></p>
The "<%= 2 + 2 %>" contains a Java expression that will be evaluated, and the result will appear on the web page. Run the project to see what happens: You can right-click the editor and select "Run File" or you can use the "Run" button at the top of the screen, or you can select "Run Main Project" from the "Run" menu. All these options will start up the Tomcat server and open a web browser to view the page. (The "Run File" command opens the file to which you apply it; the other two commands always open the project's home page, index.jsp.) All this should tell you that 2+2 is 4.
Note: The Tomcat server will continue to run as long as NetBeans is open. It will be shut down automatically when you exit NetBeans.
We really don't want to work with JSPs until later in the course, so start an ordinary HTML file. To do this. right-click the project name and select "New" / "HTML". You will have to enter a name for the file, not including the ".html" extension.
For your first exercise in this lab, you will use document.write() to generate some content on your web page. Remember that document.write() is executed as the page is loaded. You can use this command inside a <script> element in the <body> of the page to generate some content that will be part of the page when it first appears to the user.
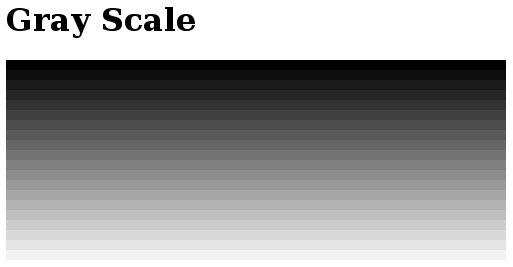
You should either do the following, or something of similar complexity: Make a web page that looks like this:
Each gray bar in this image is actually a <div> created by a command such as
<div style="width: 500px; height: 10px; background-color: rgb(15%,15%,15%)">
with percentages in the background color varying from 0 to 100. You should use a script with a for loop and document.write() to make all the bars.
If your web browser is already open, viewing the home page of your application, you can access the HTML page simply by adding the name of the file to the URL in the browser's location box. Also, since the page does not contain any JSP, you could simply open the file directly in a browser.
Note: Firefox has an "Error Console" that shows errors in a web page, including errors in JavaScript execution. You will probably find it to be useful for debugging. To open it, use the "Error Console" command in Firefox's "Tools" menu. When one of my pages has a problem, I find it useful to hit "Clear" in the Error Console and then reload the page; this makes sure that I only see error messages that are relevant to the most recent version of my page. If you don't clear the error console, you also see error messages from previous page loads.
For a second and longer exercise, you will write a web page that uses cookies to keep track of a simple user preference. To manipulate cookies with JavaScript, you will use two functions, setCookie and getCookie that are defined in the file "Cookie.js", which you can find in the directory "/classes/s09/cs271." You can simply copy-and-paste this file into the "Web Pages" folder in your project. You can then add a <script> tag to the head of your document that imports this JavaScript file.
A cookie is simply a name/value pair stored on the user's computer. The cookie is only visible to pages on the same web site that created it. Some users turn off cookies, but that is probably rather rare these days. Assuming that you've loaded "Cookies.js", you can set a cookie by calling, for example,
setCookie("stylepref","blue",365*24*60*60);
This stores a cookie with name "stylepref" and value "blue" that will last for one year (365*24*60*60 seconds). If you leave off the last parameter, the cookie will only last until he user closes down the web browser program. Later, you can retrieve the value of the cookie by calling
getCookie("stylepref")
Here is what I would like you to do: Write a web page that has several alternative styles; you might use a copy of your home page for this course. The style that is actually used should be based on the value of a cookie. A script in the head of the document should read the value of the cookie and write the code necessary to apply the style, based on that value. It can do this by using document.write either to write alternative <style> elements or to import alternative style sheet files.
To set the preferred style, you can include a set of buttons at the top or bottom of the page, corresponding to the possible styles. Each button can be created with a tag such as:
        <input type=button value="Blue"
               onclick="setPreference('blue'); window.location.reload();">
Here, value="Blue" sets the text that is displayed on the button; setPreference is a JavaScript function that you should write to set the appropriate cookie (or call setCookie directly inside the tag); and the command window.location.reload() will reload the page so that the new style preference will come into effect.