CPSC 324, Fall 2002
Lab 12, Part 1: Ray-tracing
IN THE FINAL, two-part, lab for this course, you will take a short look at two advanced rendering techniques: ray-tracing and radiosity. Today, you will work on ray-tracing, using the Windows version of the POV-Ray program. Next week will be devoted to radiosity. The point here is not to master these techniques but to become more acquainted with them and to see what they can do.
For today, you should create some images using POV-Ray. You can do this using elements from my starter file or from other example files. Choose your favorite image and add it to your Web site. I don't expect you to spend a great deal of time on this outside of class.
Ray Tracing with POV-Ray
The free ray-tracing program, POV-Ray, is very full-featured and can be used to produce pretty fancy images. You might want to look through the large collection of images from the Internet Ray-tracing Competition at http://www.irtc.org/stills/index.html. (Note that each two-month competition has a winners page that includes a link to another "Viewing Page" with all the entries for that competition.) POV-Ray can also do animation and even has some support for radiosity. The input to POV-Ray consists of plain text files that contain scene descriptions written in POV-Ray's own scene description language. Although there are modeling programs that export POV-Ray scene description files for rendering in POV-Ray, it's possible to produce a POV-Ray file with a plain text editor. That's what you'll be doing in this lab.
You should work under Windows. Go to the cpsc324 folder on the
PCCommon drive. You will find a short-cut for POV-Ray. Double-click
on it to start the program. You'll see a window that already contains
a sample POV-Ray scene description, biscuit.pov. To render the
scene described in the window, click the "Run" icon in the toolbar or
choose the "Start Rendering" command from the "Render" menu.
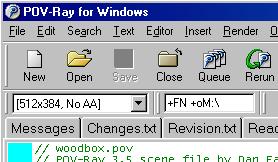 A pop-up menu in the toolbar allows you to select the size of the image and
whether you want anti-aliasing (AA) to be used. (The menu is set to
"512x384, No AA" in the picture at right.) A large anti-aliased
image can take quite a while to compute, so use small, No-AA images
for trial runs. However, you should try biscuit.pov at
size 640x480 with anti-aliasing -- it's rather nice. The window
has tabs at the top of the text window that can be used to select
files that have been opened. One of these is woodbox.pov,
which you can also try if you like.
A pop-up menu in the toolbar allows you to select the size of the image and
whether you want anti-aliasing (AA) to be used. (The menu is set to
"512x384, No AA" in the picture at right.) A large anti-aliased
image can take quite a while to compute, so use small, No-AA images
for trial runs. However, you should try biscuit.pov at
size 640x480 with anti-aliasing -- it's rather nice. The window
has tabs at the top of the text window that can be used to select
files that have been opened. One of these is woodbox.pov,
which you can also try if you like.
POV-Ray always tries to save the images that it renders. By default, it saves them in the same directory as the source file that contains the scene description. The name of the file will be the same as the name of the scene description file, with an extension appropriate for the type of image. The Windows version of POV-Ray saves images in BMP format by default. BMP images take up a lot of space. To specify a different image format and file destination, you can enter some command line parameters. These can be entered in the input box next to the popup menu. The option "+FN" sets the image format to be PNG instead of BMP. The option "+oM:\" sends the output file to the directory M:\, where your personal files are stored on the Windows network. These options are shown entered in the picture above. I suggest that you use them for the rest of the lab. If you get messages about "output restrictions" preventing writing to M:\, you can set the "Script I/O Restrictions" option to "No Restrictions" in the "Options" menu.
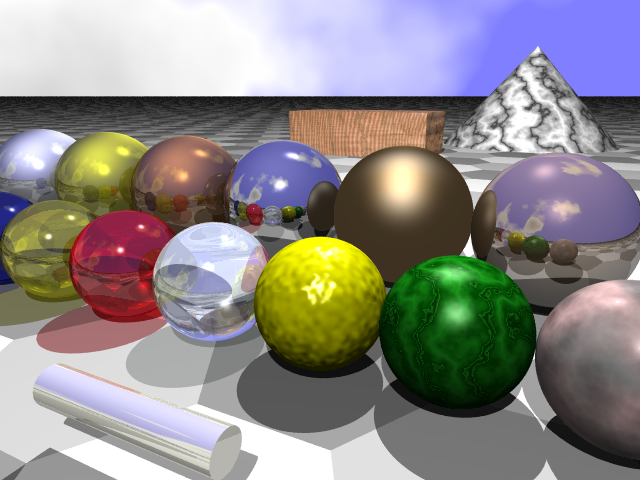
I've made my own sample scene that contains a variety of objects with a variety of textures. You will find a copy of the scene description in the file starter.pov in the cpsc324 directory. Open this file with the "Open" command in the "File" menu, and render it to see what it looks like. The scene description contains a sequence of object/light/camera specifications that set up the scene. You can use the same lights and camera, if you want, for your own scenes, but they are pretty easy to figure out once you know something about the syntax. You should know that the z-axis in POV-Ray points into the screen rather than out of the screen as it does in blender. Also, points and vectors in POV-Ray are specified using angle brackets rather than parentheses, so <3,3,-6> represents the point 3 units over from the center, 3 units up, and 6 units in front of the screen. Let's take a look at the first object specification in starter.pov, which describes the ugly, bumpy yellow sphere in the center of the image:
   sphere {
     <0, 0, 0>, 1
     texture {
       pigment { color Yellow }
     }
     normal {
        bumps 0.3 scale 0.1
     }
     finish {
        phong 1
     }
   }
In this specification, the type of object (sphere) is followed by a block that specifies the properties of the object. The first item, <0,0,0>, is the center of the sphere. This is followed by the radius of the sphere, 1. Then, a texture, a normal map, and a finish are specified. In this case, the "texture" is simply a yellow "pigment", that is a solid yellow color. The "normal" specification is a bump map that makes the surface look bumpy. The "finish" adds a reflective hilite. Other items can also be added to an object specification, including interior properties for hollow objects and transformations. And the properties can get very complicated.
Fortunately, POV-Ray makes it possible to define macros, and a lot of standard macros are available in a number of standard include files. Two of these files, "colors.inc" and "textures.inc", are included at the top of starter.pov. (Other standard include files are listed in the "Insert" menu.) Some of the macros defined in these files are textures, some are pigments, etc. You can use a texture or pigment macro in a texture specification. For example, look at the second sphere in starter.pov:
   sphere {
      <2, 0, 0>, 1
      texture {
        Jade
      }
      finish {
         phong .5
         phong_size 20
      }
   }
Here, "Jade" is a macro that defines a pigment that is supposed to look like jade. I added a finish to this, since without the finish, it looks non-reflective and dull. For most of the objects in the scene, however, I simply used a pre-defined texture with no modification. For example, the most reflective of the spheres is defined as:
   sphere {
      <-3,.5,4>, 1.5
      texture {
         Polished_Chrome
      }
   }
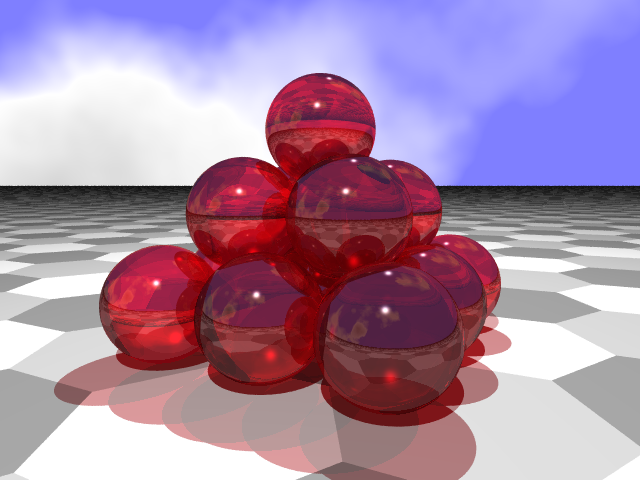
Your assignment is to compose a couple of simple scenes that shows off some of the features of ray tracing. A classic scene, for example, shows a pyramid of glass or metal spheres. You can copy pieces of code out of starter.pov to help you create your scenes. You could also take a look in the "Insert" menu. Put a rendered image of your best scene on your web site.
Running POV-Ray Under Linux
POV-Ray can be used under Linux, but only on the command line. There is no nice GUI, but the basic rendering program and include files are the same. Use the command x-povray if you want to see the image in the process of being rendered. This command requires certain command-line parameters. The input file must be specified on the command line as +Ifilename where filename is the name of the file and there is no space between the +I and the file name. For example, the command
x-povray +Istarter.pov
will render a file named starter.pov in the current directory. (You could leave out the ".pov" since that is the default file extension for POV-Ray input files.) By default, the output file will be in PNG format and will be named starter.png. The size of the image will be 320 by 240, and it will not be antialiased. You will not see the image being rendered. To change this behavior, you can add other command-line options. Add +A to get anti-aliasing. Add +D to see a display of the image as it is being rendered. To set the width and height of the image, use something like +W640 +H480. (The letters A, D, I, W, and H are not case-sensitive.) If you were running POV-ray regularly on your own computer, you could change the default behavior by editing the file povray.ini in the directory /usr/lib/povray31. The standard include files for POV-Ray can be found in the subdirectory /usr/lib/povray31/include,
For example, to render starter.pov at 800x600 resolution with antialiasing and see the scene as it is being rendered, you could say
x-povray +Istarter +W800 +H600 +A +D
(Note to students in CS441: There is a version of POV-Ray that uses PVM to distribute pieces of the computation to a number of slave tasks. The command is pvmpov and you can use it just like x-povray, except that you must be running PVM in order to use it, and it will not show the image as it is rendered. Make sure that you use xpvm or pvmh, not just pvm, to start PVM.)