Previous:The Sky Sphere Main Index Next:Adding the Sun
Beside the single color sky sphere that is covered with the background feature the simplest sky sphere is a color gradient.
You may have noticed that the color of the sky varies with the angle to the earth's surface normal. If you look straight up the sky normally has a much deeper blue than it has at the horizon.
We want to model this effect using the sky sphere as shown in the scene below (skysph1.pov).
  #include "colors.inc"

  camera {

    location <0, 1, -4>

    look_at <0, 2, 0>

    angle 80

  }

  light_source { <10, 10, -10> White }

  sphere { 2*y, 1

    pigment { color rgb <1, 1, 1> }

    finish { ambient 0.2 diffuse 0 reflection 0.6 }

  }

  sky_sphere {

    pigment {

      gradient y

      color_map {

        [0 color Red]

        [1 color Blue]

      }

      scale 2

      translate -1

    }

  }
The interesting part is the sky sphere statement. It contains a pigment that describe the look of the sky sphere. We want to create a color gradient along the viewing angle measured against the earth's surface normal. Since the ray direction vector is used to calculate the pigment colors we have to use the y-gradient.
The scale and translate transformation are used to map the points derived from the direction vector to the right range. Without those transformations the pattern would be repeated twice on the sky sphere. The scale statement is used to avoid the repetition and the translate -1 statement moves the color at index zero to the bottom of the sky sphere (that's the point of the sky sphere you'll see if you look straight down).
After this transformation the color entry at position 0 will be at the bottom of the sky sphere, i. e. below us, and the color at position 1 will be at the top, i. e. above us.
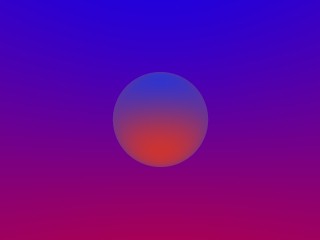
The colors for all other positions are interpolated between those two colors as you can see in the resulting image.
A simple gradient sky sphere.
If you want to start one of the colors at a specific angle you'll first have to convert the angle to a color map index. This is done by using the formula
color_map_index = (1 - cos(angle)) / 2
where the angle is measured against the negated earth's surface normal. This is the surface normal pointing towards the center of the earth. An angle of 0 degrees describes the point below us while an angle of 180 degrees represents the zenith.
In POV-Ray you first have to convert the degree value to radian values as it is shown in the following example.
  sky_sphere {

    pigment {

      gradient y

      color_map {

        [(1-cos(radians( 30)))/2 color Red]

        [(1-cos(radians(120)))/2 color Blue]

      }

      scale 2

      translate -1

    }

  }
This scene uses a color gradient that starts with a red color at 30 degrees and blends into the blue color at 120 degrees. Below 30 degrees everything is red while above 120 degrees all is blue.
Previous:The Sky Sphere Main Index Next:Adding the Sun