CS 424: Computer Graphics, Fall 2015
Lab 2: 2D Graphics with HTML Canvas
This lab consists of two exercises on drawing with the HTML canvas 2D graphics API, which was covered in Section 2.6. It requires some knowledge of JavaScript, which was covered briefly in Section A.3.
You will need copies of the following files, which you can find in /classes/cs424/lab2-files or download from the Web: Lab2Ex1.html and Lab2Ex2.html. You can edit these files with a text editor or with Komodo Edit.
Turning in your work: Your programs must be submitted by the beginning of the lab period next Thursday. They must be in a folder named lab2 inside your homework folder in /classes/cs424/homework. The files must have their original names, Lab2Ex1.html and Lab2Ex2.html.
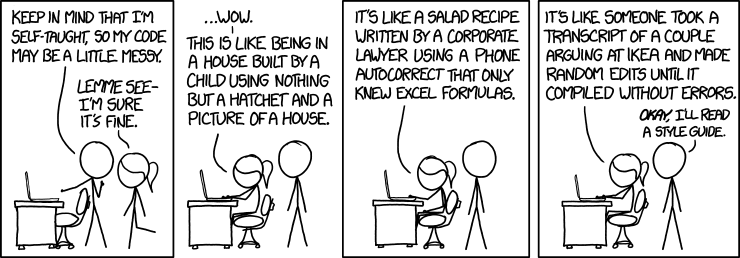
For this lab, you should add appropriate comments to the new code that you write. And don't be this guy:
About Komodo Edit
Komodo Edit is a free programming environment with support for several languages. In particular, it supports Web development using HTML, CSS, and JavaScript. Although it is not required, I suggest using it for the JavaScript programming that you do for this course. Komodo Edit 9.1 is installed on the Linux computers in our labs. It also runs on Windows and Mac OS. It can be downloaded from http://komodoide.com/komodo-edit/. (Download Komodo Edit, not Komodo IDE, which is the more powerful commercial version.)
A Komodo Edit project is simply a folder that contains a project file with the extension .komodoproject. To start a project, use the "New Project" command in the "Project" menu. You will be asked to save a .komodoproject file. You can save it into an empty folder or one that already contains some files. All the files and subfolders in the folder will automatically be part of the project. If you add new files to the folder, they will automatically be added to the project. You might want to create a project to hold all of your JavaScript work for the course. You could also create a project for each lab. (In fact, you can use Komodo Edit to edit files that are not part of a project, but there are some advantages to having a project to organize your work.)
For this lab, after creating the project, you should copy the two HTML files into the project folder. You will see them listed in the project contents on the left side of the Komodo window. Double-click a file name to open it for editing.
To open the HTML file that you are editing in a Web browser, click the "world" icon in the toolbar. A "Preview" dialog will pop up where you can select the browser that you want to use. (The "Default" browser is the Komodo Edit window, and it will open the page in a new tab.) Note the checkbox for "Remember this selection for this file". Once the file is open in a web browser, you can just use the browser's reload button to view the results after modifying the program. (But don't forget to save the program first.)
(Note: Komodo Edit has a peculiar "feature" that makes it impossible to store your user preferences in your home directory on our AFS file server. The command that runs Komodo Edit on the lab machines is actually a wrapper that puts the user preferences folder in the /tmp directory on the local hard drive. This works, but it means that if you move to a different computer, your preferences will not carry over. This is not a big deal, but it means that Komodo Edit will not remember the project that you were working on, and you will have to use the "Open Project" command in the "Project" menu to get back to it. You can avoid that by always using the same computer. Or by using your own computer.)
Exercise 1: Shapes
The file Lab2Ex1.html is a copy of the sample program GraphicsStarterPlus.html from the textbook, with the sample drawing code removed. For the first part of the lab, you should add new drawing code to the draw() function in Lab2Ex1.html to draw the following picture, including the dividing lines:
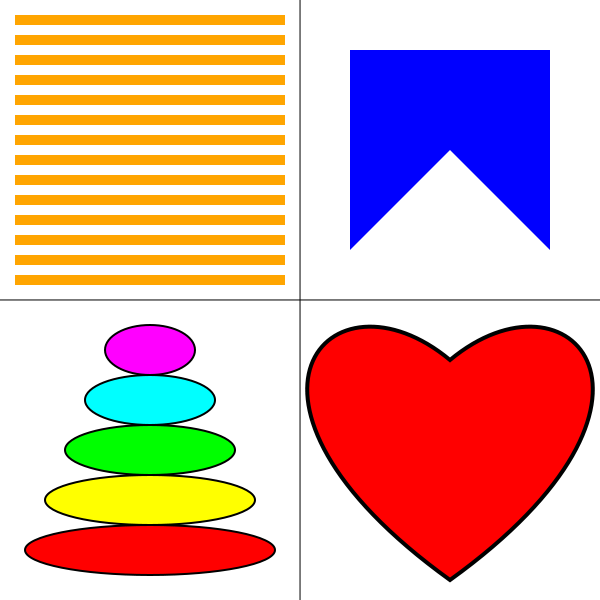
The heart can be drawn as a path made up of two Bezier curves. I suggest that you try making a heart in the Bezier curve demo from Section 2.2 to get some idea of where the control points need to be placed. It will take some experimentation to get the shape right!
The size of the canvas is 600-by-600. You can use the standard pixel coordinates, or you can apply a transformation to use a more convenient coordinate system. If you do the later, remember that line width is also transformed, and you will probably find it convenient to set the line width as a multiple of the global variable pixelSize. You also have the option of drawing the objects directly in world coordinates or using modeling transformations. In fact, I mostly just used plain pixel coordinates when I drew the picture.
The 2D graphics context in the program is named graphics. It has all the properties discussed in Section 2.6 of the textbook. In addition, the following non-standard drawing commands have been added to the graphics context:
graphics.strokeLine(x1,y1,x2,y2)— draw the line segment from (x1,y1) to (x2,y2).graphics.strokeCircle(x,y,r)— stroke the circle with center (x,y) and radius r.graphics.strokeOval(x,y,rx,ry)— stroke the oval with center (x,y), horizontal radius rx, and vertical radius ry.graphics.strokePoly(x1,y1,x2,y2,x3,y3,...)— stroke the polygon with vertices (x1,y1), (x2,y2), (x3,y3), ...graphics.fillCircle(x,y,r)— fill the circle with center (x,y) and radiusgraphics.fillOval(x,y,rx,ry)— fill the oval with center (x,y), horizontal radius rx, and vertical radius ry.graphics.fillPoly(x1,y1,x2,y2,x3,y3,...)— fill the polygon with vertices (x1,y1), (x2,y2), (x3,y3), ...
Exercise 2: Mousing
For the second exercise, you will work with Lab2Ex2.html, a program that implements mouse interaction. As it stands, the program draws a sequence of squares as the user drags the mouse on the canvas. You will add several additional drawing tools that respond to a mouse drag in different ways.
A drag action consists of a mouse down event, a sequence of mouse move events, and a mouse up event. The program defines functions to respond to these events. To implement the new tools, you will work mostly in the function doMouseMove(), which responds to mouse move events. You might also need to add something to doMouseDown(). Aside from implementing the tools, there are a few more things that have to be added to the program.
First, you should add a "Clear" button to the program. When the user clicks the button, the canvas should be filled with white. To do that, you need to add the HTML code for the button itself to the <body> of the web page. That takes the form
<button id="clearButton">Clear</button>
And you need to set up an event handler to respond to click events on the button. To do that, define a JavaScript function to clear the canvas. Then, as part of initialization, install it as the event handler using a command of the form
document.getElementById("clearButton").onclick = doClear;
where doClear is the name of the function.
Second, add at least one new color to the <select> element that creates the Color popup menu. Implement the new color by adding code to the doMouseMove function.
Third, add a new <select> element that will let the user select the drawing tool that they want to use, and implement that menu by adding code to the mouse-handling functions. This is the major part of the exercise. You should add at least four new tools. They must include:
- A tool similar to the original squares tool, except that it draws a non-trivial shape such as a star or a heart. (Non-trivial means that you need to create it as a path or polygon. In particular, not just circles or ovals.)
- A Curve tool that simply draws a line segment from the previous mouse position to the current mouse position. Note that the variables prevX and prevY are already defined to represent the previous mouse position.
- A tool that uses the starting position of the mouse, which is given by the variables startX and startY, as well as the current position. For example, draw a circle with center at the starting point and passing through the current position.
- One additional tool of your choice. (You might consider an "erase" tool that simply draws in white.)
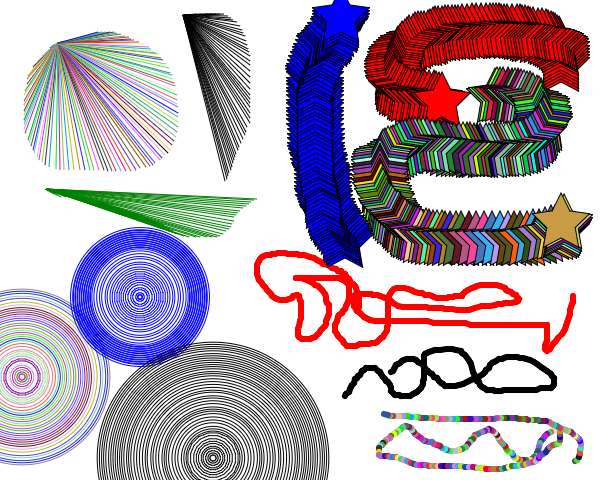
Here, for example, is a drawing made with my completed version of the program, showing examples of four tools: