This assignment consists of some work on the computer plus a couple of essays. The assignment is due in class next Wednesday, April 16. For the computer exercises, 1 through 3, you should save your images with a name that includes your own name, and copy the images to my "Drop Box" folder, inside the cpsc120 folder on PCCommon. I will post some or all of your images on the course web page. Grading of the computer exercises will be somewhat competitive, based on the attractiveness or interest of your images.
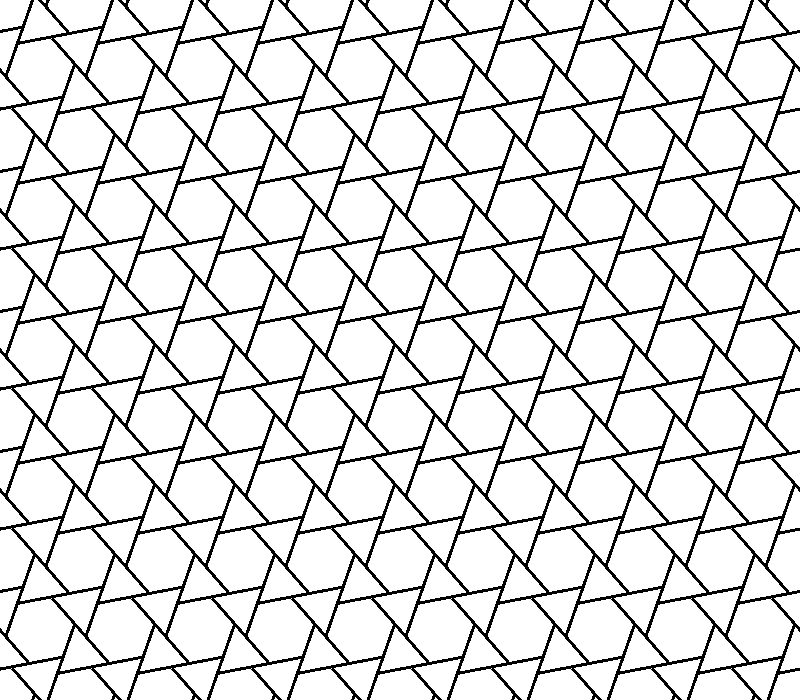
Exercise 1. Use the EscherSketch program, described below, to make an interesting or attractive tiling of the plane. For this exercise, your tiling should be made up of straight black line segments, drawn using the program's line tool. The picture should be made up of a small number of basic polygonal shapes. As an example, you can look at http://math.hws.edu/eck/math110/tiling.png (but maybe your picture will look better than this).
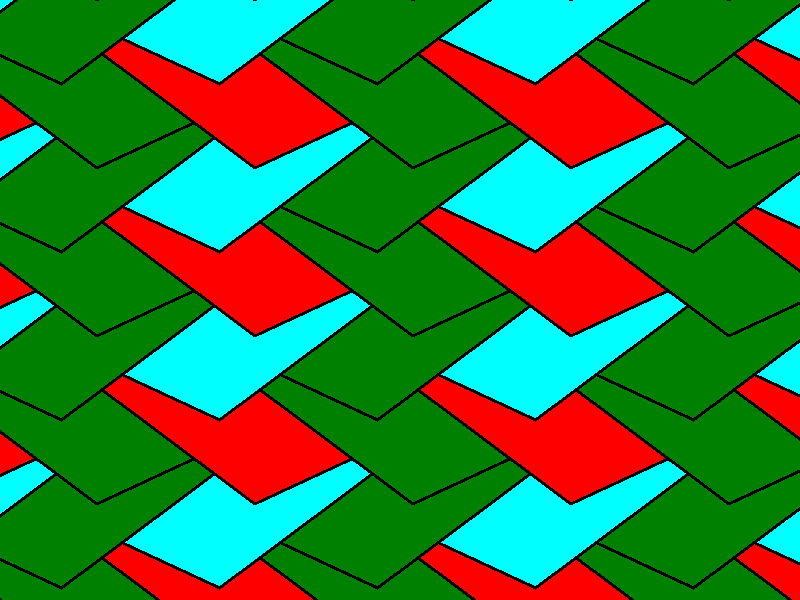
Exercise 2. Use the EscherSketch program to create a second tiling, and then fill in the figures in the image with color in an attractive pattern. Your pattern of colors should have it's own symmetry. For a not-too attractive example, see http://math.hws.edu/math110/tiling2.png. You can use the Windows Paint program to add the colors. Open your picture with Paint. (You can just right-click the picture's icon, and go to Open With... / Paint.) To fill an area with color, select the "Fill with Color" tool in the upper right; it looks like a tipping paint can spilling paint. Select the color that you want to use at the bottom of the window. Click the area in the image that you want to fill with color. You can also click an already-colored area to change its color. To get other colors besides the ones in the palette at the bottom of the screen, double-click the color in the palette that you want to replace.
Exercise 3. Finally, make one more image with EscherSketch. Do anything you like with it. Improve the image using the Paint program, if you want -- or even with Photoshop, if you know how to use it. If your picture looks something like an Escher drawing, so much the better.
Exercise 4. Choose one of Escher's artworks at www.mcescher.net that explores the relationships between the two-dimensional surface on which the art is drawn and the three-dimensional world that it portrays. Examples include Belvedere, Drawing Hands, Hall and City, Rind, Relativity, and Dragon. Write a paragraph about the selected work of art, discussing what the picture has to say about dimensions and our perception of them.
Exercise 5. Pick one of the following essay questions, inspired by the movie Flatland that we viewed in class. Write a one-page essay on your selected topic.
Escher Web Sketch is a program for drawing repeating patterns in the plane using various kinds of symmetry. It was written by Nicolas Schoeni, Wes Hardaker and Gervais Chapuis at The Swiss Federal Institute of Technology (EPFL), Switzerland and is available on the web at http://escher.epfl.ch/escher/. I have placed a copy of the program in the cpsc120 directory on PCCommon on the campus windows network. The name of the program there is escher_sketch.exe. You can run the program by doulble-clicking the icon. If you want to run it on your own computer, you can dowload the jar file
http://math.hws.edu/eck/math110/escher_sketch.jar
You must have Java on your computer to run this program. You could also use the applet on-line at the address given above, but then you won't be able to save the images that you create.
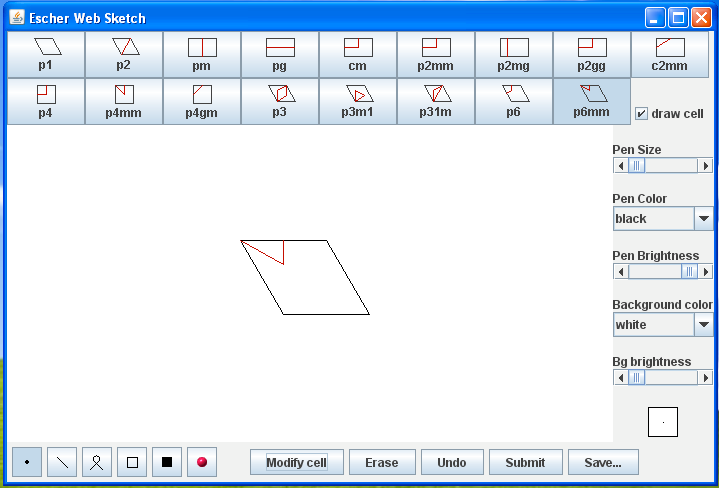
When you first open the program, it will look approximately like the picture shown below. There is a large drawing area in the center of the window. Along the top are two rows of buttons that control the type of symmetry that is applied to the image that you draw. Along the bottom are six buttons for selecting the drawing tool and five other control buttons. There are several additional controls along the right edge of the window:
To use the program, you should first select the symmetry type for your drawing by clicking one of the buttons along the top of the window. There are 17 possibilities, corresponding to the 17 "wallpaper groups." These groups represent all the possible types of two-dimensional repeating patterns, and we will be discussing them further in class. (See the Wikipedia article on Wallpaper Groups.)
When you select a symmetry type, the basic "cell" for the symmetry type will be shown in the drawing area. (The cell is not really part of the drawing; its display can be turned on and off using the "draw cell" toggle at the upper right.) The drawing as a whole is created by repeating the contents of the basic cell infinitely to the left and right and above and below. Futhermore, in all but one case, the contents of the basic cell are obtained by repeating a smaller area inside the cell. This area is outlined in red (on at least one edge) and is referred to as the fundamental domain. The entire plain will be "tiled" or "tessalated" with the contents of the fundamental domain.
You will probably find that the basic cell is too small. To increase its size, click the "Modify cell" button. You will then have to click the drawing area once where you want the upper left corner of the cell and then again where you want the lower right. For the first two symmetry types, you will have to click a third time to set the angle in the parallelogram.
I suggest that you increase the pen size by clicking a couple times on the right-hand arrow of the "Pen Size" slider on the right edge of the window. I also suggest starting with the line tool -- click the second button from the left along the bottom of the window.
To use the line tool, click the mouse button and hold it down while moving the mouse. You will see the line from the intitial point to the current mouse location. You will also see all the symmetric repetitions of that line. The lines will be permanently added to the drawing when you release the mouse. I have found that it is often helpful to start my lines along the boundary of the basic cell or fundamental domain or at one of the corners.
You will probably want to try some other colors besides black and some of the other drawing tools. In particular, the free-hand drawing tool, just to the right of the draw tool, can be very useful. You can erase an entire drawing, and you can undo just the most recent operation that you performed on the drawing. If you accidently erase the drawing, you can get it back by clicking the "Undo" button before you do anything else.
To save your work, click the "Save..." button. You will first get a dialog box where you can specify the size of the image that you want to save. I suggest selecting a relatively small size, such as 800x600 pixels. After that, you will get a regular file-save dialog where you can specify a name for the file and the location where you want to save it. For the exercises in this assignment, remember to include your name in the name of the file, and remember that in the end you have to copy the files that you want to submit into my drop box folder. (By the way, do not use the "Submit" button. This button is supposed to send your drawing to Switzerland, but it doesn't seem to work in any case.)