
| CPSC 120 | Principles of Computer Science | Fall 2024 |
Labs are due at the start of class. It is OK if you show up and copy your files to the handin directory at the very beginning of class, but this should take at most a couple of minutes and you should not spend the next lab period finishing up the previous week's lab. I will check timestamps, and files handed in more than five minutes after the start of lab will be considered late.
See the policy on late work and extensions.
Loops provide a powerful shortcut for repetition — instead of cutting and pasting (with lots of small, tedious, error-prone edits) to get multiple copies of something, a loop allows you to repeat things as often as you want with only a few extra lines of code.
Quilts once again provide a good source of inspiration, since quilt block patterns often utilize repetition in their designs and the quilt itself is often constructed from multiple copies of individual blocks. This lab features three traditional quilt blocks.
Successfully completing this lab means that you are able to:
work with loops in Processing, including
construct sketches using loops, including
The short version:
Help with learning the process of constructing programs is fine; shortcutting the process and arriving at a result that you didn't produce yourself or don't fully understand how to produce is not.
Always attempt the problem yourself first, using this lab handout, the materials from class posted on the schedule page, and the assigned reading in the textbook.
Your primary resources for help should be office hours and the Teaching Fellows.
You may not work with other students to write code together.
You may not shortcut to a solution by copying code (except as specifically authorized in instructions) or using someone else's program as a guide or to understand what yours should be like even if you don't directly copy anything, You may not be in possession of someone else's program or solution before you have handed in your own.
You must document any help received (including from TFs) and any resources used other than the textbook and posted course materials. Put comments in your sketch indicating who helped (or the source used) and how / with what.
Make sure that you understand not only the result achieved, but also how one knows what to do to achieve that result. This gets at the process of writing a sketch — identifying what code elements are needed, filling in the details for a particular task, and pulling it all together.
Review the discussion in previous lab handouts and the full collaboration policy for more details.
To hand in your work:
Make sure that your name and a short description of the sketch are included in a comment at the beginning of each sketch.
Make sure that you've auto-formatted each sketch.
Copy the entire lab8a, lab8b, lab8c, and lab8d directories from your sketchbook (~/cs120/sketchbook) to your handin directory (found inside /classes/cs120/handin).
Review the repeat-as-long-as and repeat n times (counting loop) patterns for loops — the slides and the in-class exercises handouts contain the loop questions to ask yourself to identify the elements, the template for the code to use a loop, and examples for how the answers to the loop questions slot into the code templates. It is also useful to review the posted examples to see how a loop fits into a whole sketch, and the posted solutions for the in-class exercises for additional examples and to practice identifying the elements of the loop pattern for yourself.
Also read through all of each exercise before starting it — there's important information about how to do the task after the initial statement.
The exercises ask you to design your sketches so that they work with any size window. Remember that this means to use the system variables width and height instead of specific numbers when referring to the drawing window dimensions.
Put your name and a description of the sketch in comments at the beginning of each sketch. Also don't forget to Auto Format your code before handing it in. (Refer back to lab 2 for more on Auto Format if needed.)
You must use loops wherever it is appropriate to do so! (Reminder: a loop when something repeats more than a few times and there is predictable change from one copy to the next.) You will receive very little credit for producing the right drawing without using loops.

Create a sketch named lab8a which displays a strip of right-pointing flying geese, as shown. Each "goose" is a triangle whose long dimension is twice the length of the short dimension; for a horizontally-oriented pattern, this means the height of the triangle is twice the width.
Make the drawing window much wider than it is tall (as shown in the illustration). Each triangle should span the full height of the drawing window, and the pattern should repeat as many times as can fit fully in the window — leave blank space on the right side if there isn't room for a whole triangle. You don't need to have exactly the same number of triangles as shown in the illustration. The triangles can be any color.
Design your sketch so that it works with any size window.
To create this sketch:
Create a new sketch, add your name and a description of the sketch in comments at the beginning, and save your sketch as lab8a.
Ask yourself the loop questions below, write the answers in comments in your sketch (similar to what was done for the examples in class), and add the corresponding code/code structure for each as you go.
Is there repetition of a predictable nature? (This tells you whether a loop is needed. It is.)
What is repeated? (This tells you what goes into the body of the loop.)
What changes from one repetition to the next? (This tells you what loop variables are needed. Try to keep this to as few loop variables as possible, within reason — as with animation, if multiple values maintain a fixed relationship, you only need one variable because you can use expressions for the other values.)
How do things start? (This tells you how to initialize the loop variables.)
How do things change? (This tells you how to update the loop variables.)
When do you keep going? Repeat-as-long-as (or repeat-until) or a repeat n times? (This tells you whether it is a counting loop or not, and, if not, what the loop condition is.)
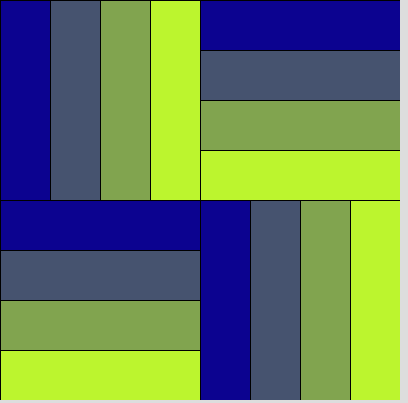
Create a sketch named lab8b which displays a single rail fence block, as shown. There should be four stripes within each quadrant, with a smooth change in the color of the stripes from left to right and top to bottom.
Make the drawing window square. The block should fill the entire drawing window, and the stripes should be sized so that four stripes exactly fill each quadrant. It is OK to vary just one color component, such as going from red to black, or you can do something more complex than involves varying two or more color components, like the blue-to-green color scheme shown in the example.
Design your sketch so that it works with any size window.
To create this sketch:
Create a new sketch, add your name and a description of the sketch in comments at the beginning, and save your sketch as lab8b.
Start with the vertical stripes in the upper left quadrant. Go through the loop questions (write the answers in comments in your sketch!) and write the loop, as you did in the previous exercise.
The same vertical stripes pattern appears in two places. Create a parameterized function to draw a set of vertical stripes, move the loop you wrote in the previous step to the function, and then call the function twice from draw() to draw the vertical stripes pattern in the upper-left and bottom-right quadrants. Note that you must use different names for the function parameters and the loop variables.
Repeat the previous two steps for the horizontal stripes in the upper right and lower left quadrants. If you are comfortable with parameterized functions, you can start with the drawing function and develop the loop in the function body instead of the two-step process of first writing the loop in draw() and then developing the drawing function.
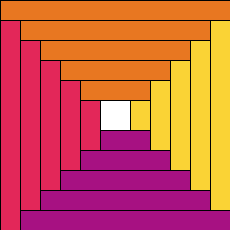
Create a sketch named lab8c which displays a single log cabin block, as shown. Pay careful attention to the example so you get details of the pattern correct!
Make the drawing window square. The block should fill the entire drawing window, and each rectangle should be 20 pixels wide (vertical rectangles) or high (horizontal rectangles). While the quilt block is built from the inside out, yours will be built outside in — include as many rectangles as fit, leaving a blank space in the middle if there isn't enough room to have another complete set of rectangles. Use four different colors as shown, but you can pick any colors you want.
Design your sketch so that it works with any size window.
To create this sketch:
Create a new sketch, add your name and a description of the sketch in comments at the beginning, and save your sketch as lab8c.
What repeats? One option is four separate loops, one for each color of rectangles; another is a single loop whose body draws four rectangles (one of each color). Decide on how you want to decompose the pattern.
Go through the loop questions (write the answers in comments in your sketch!) and write the loop(s), as you did in the previous exercises.
Hint: the keep-going condition for the loop(s) can be a little tricky to get right. Use the strategy recommended earlier in the semester — draw a picture and label what you know so that you can figure out expressions for the values you need but don't have directly. Going from the outside in, you only want to draw another rectangle if there's room for another whole set — this means that the rectangle needs to fit entirely within its half of the window.
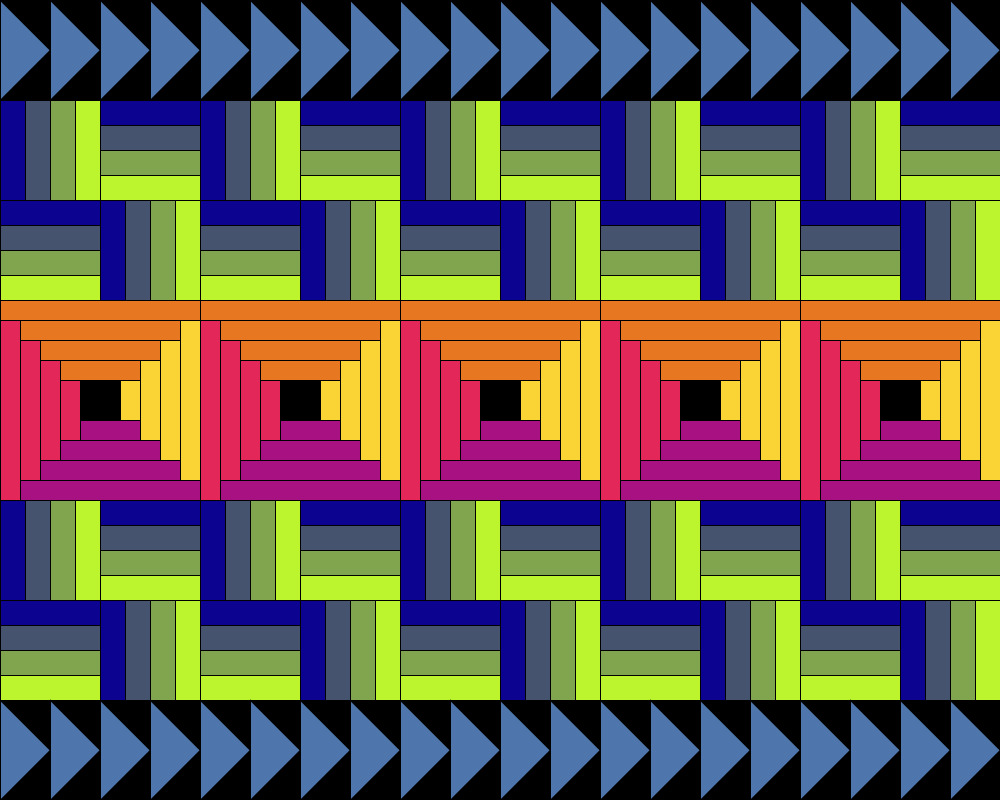
Create a sketch named lab8d which uses the blocks you created in #1-3 to make a quilt as shown — there should be a strip of flying geese at the top, then a row of 5 rail fence blocks, a row of 5 log cabin blocks, another row of 5 rail fence blocks, and a final strip of flying geese. (You can choose your own colors, but otherwise your quilt should match the example.) Choose a size for your drawing window so the blocks fit nicely without distortion or extra space on one edge (in the case of the flying geese).
Your sketch should contain a drawing function for each kind of block — a strip of flying geese, a single rail fence block, a single log cabin block. (This means three drawing functions, in addition to the drawing functions used in #2.) Each drawing function should have parameters specifying the position and size of the block, and should draw the pattern filling that region. Don't forget to include comments describing each function and its parameters.
Writing the body of each function should largely be a matter of copying the relevant code from #1-3, with two changes: within each function, the parameters and loop variables must have different names (so you might need to rename some things), and the pattern now needs to be drawn within the region specified by the parameters rather than filling the whole drawing window.
Once you have a drawing function for each kind of block, use the functions to draw the whole quilt.
You can earn extra credit by going substantially beyond the required elements. Some possibilities:
Add additional parameters to one or more of the drawing functions in #4:
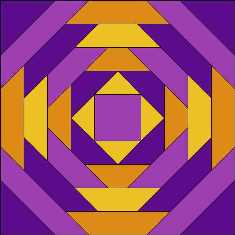
Create a new sketch named lab8e with a quilt containing some fancier quilt blocks, such as those shown below. You can also come up with your own idea for a quilt block and/or google "quilt block" to find patterns. For credit, a loop must be appropriate.
For each type of quilt block, you must have a drawing function which draws a single instance of that block. Include appropriate parameters and comments for your function(s). (For the twisted square and circular patterns, use of rotate() will be necessary/useful, as may other transformations (translate() and scale()) and the notion of vertex shapes. See sections 14.3, 14.5, and 14.7-14.8 in the textbook.)
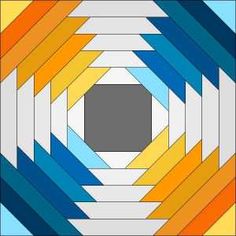
pineapple:
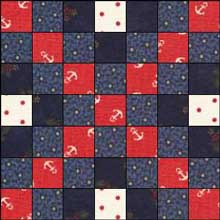
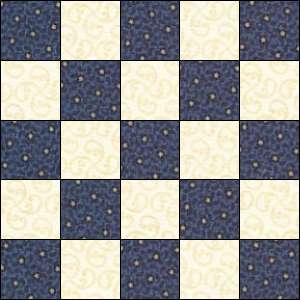
checkerboards and grids:
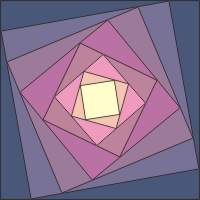
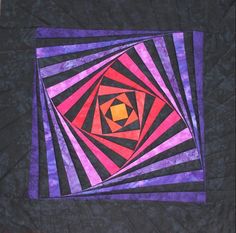
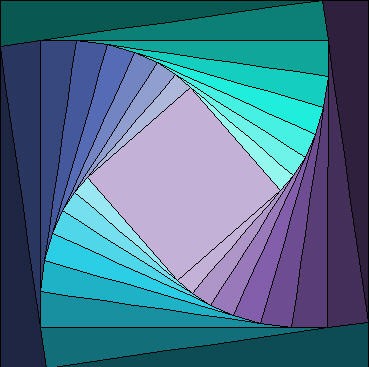
twisted square and variations:
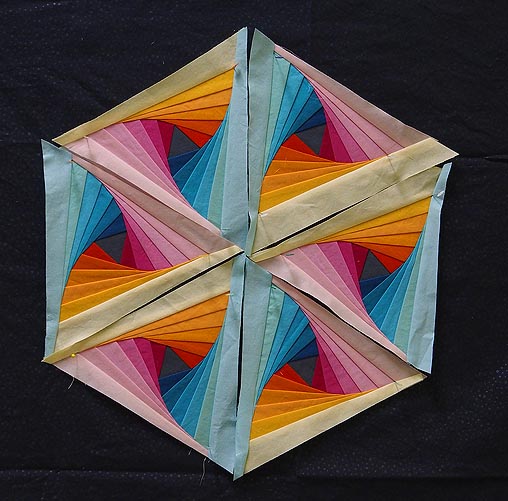
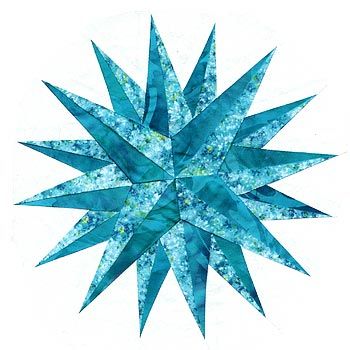
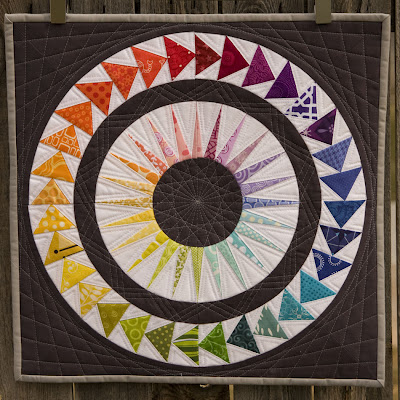
circular patterns (star, Mariner's Compass, NY Beauty):


Include a brief description of what you've done for extra credit in a comment at the beginning of your sketch. More creative and challenging elements will earn more points.