| CPSC 225 | Intermediate Programming | Spring 2025 |
This lab will introduce you to the computing and programming environment used in many of the CS courses at HWS. You'll learn how to access Linux, both in a computer lab and remotely, and navigate the desktop; how to navigate the file system, copy files, and hand in your work; and how to use Eclipse, a professional-grade tool for Java development. You'll also get your Linux working environment set up for use in this course, and, optionally, set up your own computer as an alternative to accessing Linux remotely when you aren't working in the lab.
Much of what is contained in this handout may already be familiar to you. While you can skip some of the informational parts in that case, be sure to complete all of the steps in the exercises and do all of the reddish-boxed steps in the Eclipse tutorial even if you have used Eclipse before.
Labs are due at the start of lab on the date listed. It is OK to hand in your files at the very beginning of lab, but you should not be spending part or all of a lab period finishing up the previous week's lab.
For this lab, while not officially due until next Thursday, you should complete it as soon as possible so that you are ready to work on programming tasks.
To complete this lab, read through this section and complete the bulleted steps, in order. If you'll be bringing a laptop to class and have it with you, you are strongly encouraged to test connecting to the Linux VDI before the end of lab so that any issues can be worked out before class.
Important! How to read instructions: Don't stop with just the first sentence, as there is often additional information about how to do the step following the initial statement of the step. Look through the whole section containing the steps first to get a big picture view of what you'll be doing and to determine if there's information after the steps themselves that you'll need to carry out the steps, then repeat the process as you go through each step — read more carefully through the whole bullet point or paragraph before taking any action so that you understand how to proceed.
Log in to Linux on a lab computer (Rosenberg 009 or Lansing 310). If you are new to Linux or Linux at HWS, see the Linux section.
(optional) Since you'll be using Eclipse often, you may want to add it to your favorites for easy access: open the Applications menu, locate Eclipse, and either right-click on the Eclipse icon and choose "Add to Favorites" or drag it to the Favorites section (above the little horizontal divider) in the Dock on the left side of the desktop.
If you are new to Eclipse, review the Eclipse Concepts.
Create and configure a workspace for use in this course. See Eclipse Workspace Setup.
Go through the Using Eclipse mini-tutorial to test your Eclipse setup and learn about using Eclipse for software development. Be sure to do all the reddish-boxed steps. Do this even if you've used Eclipse before! You may discover some handy new features.
Hand in your work. See Handing In Your Work.
(recommended) If you'll be bringing a laptop to class and/or want to access Linux remotely, set up and test connecting to the Linux VDI as described in Accessing Linux.
(optional) Using the Linux VDI is recommended, but if you want to work locally on your own computer without connecting to the Linux VDI, see Using Your Own Computer.
If you finish the lab early, create a new main program within your lab1 project and work on the Collatz sequence problem from the class prep for Friday.
Computer science courses at HWS make use of an operating system called Linux. An operating system is the basic software that runs the computer — it controls the hardware of the computer (such as disks and memory) and runs application software (like word processing programs and web browsers). It is the first thing loaded when the computer starts up. You are most likely already familiar with the Microsoft Windows operating system and/or the Macintosh operating system. Linux is a version of Unix, an operating system often used for servers and in academic environments. One reason for Linux's popularity is that it is free and open source, meaning that not only can you download and run it for free, the underlying code is available to anyone to add to and modify.
There are actually many different versions of Linux, known as distributions. HWS uses a version called Ubuntu. Different distributions of Linux all work the same way underneath, but they may look different or be configured differently.
Linux computers are available in Rosenberg 009 and in the Math/CS department lab in Lansing 310.
The Rosenberg 009 computers are dual-boot, meaning that they are configured to run two different operating systems (in this case, Windows and Linux). If the computer is off or running Windows when you sit down at it, you will need to turn it on or reboot it to switch to Linux. See Operating the Rosenberg 009 Dual Boot Lab Computers for how to do this.
The Lansing 310 computers run only Linux so you should not need to reboot them. If the computer is off, turn it on and wait until the Linux login screen appears.
You can also access a Linux virtual desktop remotely from your own computer. There are two options:
using a web browser (no software installation required) — see Accessing a Virtual Linux Desktop
(recommended) using the desktop client — see Installing the VMware Horizon Virtual Desktop Client
Note that you must be on the HWS campus network (connected to HWS-Private wifi or using an Ethernet cable on campus) in order to access the Linux virtual desktop. To access the HWS network from off-campus, you will need to first download and install the VPN client (Mac, Windows). Once set up, connect to the VPN (Connecting to HWS Network from Off-Campus (VPN)) before connecting to the Linux virtual desktop.
Once you get to a Linux login screen, whether you are in the lab or using a virtual desktop, enter your HWS username and password to log in.
When you are done working or will be away from the computer for a while, it is important to log out (even on a virtual desktop). One reason is security — if you don't log out, anyone who comes along will have access to your account and all your files. Another important reason is etiquette — neither the number of physical computers in the lab nor the number of virtual desktops are unlimited, so tying up a computer you aren't using may block someone else out entirely.
If you will only be away from the computer for a short time, such as for a quick trip to the bathroom, you can lock the screen instead of logging out, but the same etiquette guidelines apply — a locked screen prevents others from using the computer, and a computer locked for a long period of time may get rebooted which risks you losing work if your files aren't saved.
How to log out or lock the screen is covered in the next section ("Navigating the Desktop").
Unlike Windows and MacOS, where the desktop that you interact with is bundled with the rest of the operating system, the desktop in a Linux system is just another component and you'll likely encounter different-looking desktops if you use different Linux distributions.
For a brief introduction to the Ubuntu desktop, see A Beginner's Guide to Ubuntu Linux.
As with Mac and Windows, files in Linux are organized into a hierarchical collection of directories. ("Directory" is the traditional Linux term while "folder" is more associated with Mac and Windows; there are technical distinctions between the terms but from a user perspective both terms refer to the same concept and can be used interchangeably.) Each directory can contain files and/or subdirectories, which in turn contain files and/or subdirectories, and so forth.
Use the Files application to manage your files and directories — copy, paste, rename, delete, and (for directories) create.
Unlike Windows, Linux is case-sensitive so cs225 and CS225 are two different things. Be careful to name things exactly as directed (including case).
When choosing names for files and directories, stick to alphanumeric characters (letters and numbers) and the symbols - (dash) and _ (underscore). Some other characters, such as spaces, are legal to include but require special handling in some contexts, causing problems when I am printing your programs for grading. Please don't use spaces in file and directory names!
You have a home directory which contains your personal files. (This is similar to "My Documents" in Windows.) To go to your home directory, click the Home shortcut in the Files application.
Another directory is the root directory. This directory is the top of the file system — all other files and folders are contained, either directly or indirectly, within the root directory. In other words, you can start at the root directory and repeatedly open subfolders to reach any other file or folder on the system. To go to the root directory, click on "Other Locations" in the Files application and then click on "Computer" (which should be the first thing under "On This Computer").
Root and home directories are well-known, and you can simply say "the root directory" or "my home directory" and people will know what you are talking about. (There's also the Home shortcut in Files which lets you jump straight to your home directory.)
For files and other directories, however, it is necessary to give a pathname which specifies where the thing is located within the system's directory structure. Pathnames can be absolute, which means that the path starts from the root directory, or relative, which starts from some other directory.
The notation for writing down pathnames differs from one operating to another. In Linux:
The root directory's path is simply / (just a slash).
Absolute paths start with /, denoting the root.
Directory names within a path are separated by / and, for files, the filename is appended at the end.
~ (a tilde) refers to your home directory, and ~username refers to the home directory of user username. For example, ~alice refers to home directory of user alice.
For example, the absolute path /home/alice/work/todo.txt refers to a file todo.txt which can be found by starting at the root (/), opening the subdirectory home, opening the subdirectory alice within home, and opening the subdirectory work within alice.
Your home directory is /home/username, where username is your actual username, not the word "username". (For example, the user alice's home directory is /home/alice.) This is the directory you are taken to when you click on the Home shortcut in the Files application; the pathname tells you that you can also get there by starting at the root directory (/), opening the home subdirectory, and then opening the directory with your username within home.
~ provides a shortcut for referring to home directories. This is convenient because every user has their own home directory. For example, ~/work/todo.txt refers to a file todo.txt which can be found by starting in your home directory and opening the subdirectory work within your home directory. ~alice/work/todo.txt refers to a file todo.txt which can be found by starting the user alice's home directory and opening the subdirectory work within alice's home directory. Careful attention to detail is required here — ~alice refers to alice's home directory (/home/alice) while ~/alice refers to a subdirectory called alice within your home directory (/home/username/alice).
Programming is typically done within an integrated development environment (or IDE), which combines the basic tools of software development — an editor and a compiler — with other useful things such as automation of the build process, a debugger, code-generation tools, and support for quickly browsing and navigating the files in a large software project. Programming can certainly be done without an IDE, but a good IDE can help streamline the process and make development faster and easier.
We will be using Eclipse, an open-source IDE originally developed by IBM. Learning to use an IDE will make it easier to develop and manage large programs, and is a useful "real world" job skill. Eclipse, in particular, is nice because it is freely available and supports multiple languages (so you don't have to switch IDEs if you switch programming languages). It is also a real piece of software, used in actual software development environments — it's not a simplified teaching tool.
This lab will introduce some of the fundamental concepts in Eclipse as well as some of its most useful features. There's a lot more Eclipse can do (though not all of it is relevant at this point) — feel free to explore.
In Eclipse, a project contains all of the files associated with a single program while a workspace contains a collection of projects along with preferences and settings (like code formatting conventions) common to those projects. This organization allows you to configure Eclipse in different ways simultaneously without having to repeat configuration steps when settings are common to many different projects.
When you run Eclipse, what you see in the Eclipse window is the workbench. The workbench window contains various editors and views allowing you to see and interact with your program. A particular configuration of editors and views is known as a perspective. We will primarily use the Java perspective in its default configuration, though it is possible to customize any perspective if you wish.
To create and set up an Eclipse workspace for this course:
Create a directory ~/cs225 to hold all your files for this course and then create a directory ~/cs225/workspace for your Eclipse workspace. See Working With Files and Directories if you are new to Linux or Linux at HWS, or to review how to create directories and what a pathname like ~/cs225 means.
Launch Eclipse (from your Favorites or the Applications menu) and open your cs225 workspace directory. The first time you start Eclipse, you will be prompted to specify a workspace directory — enter ~/cs225/workspace. (If you are only using Eclipse for this course, you can check the "Use this as the default and do not ask again" box.) If you are not prompted for a workspace, you can choose "File"→"Switch Workspace"→"Other..." once Eclipse starts up.
Configure the workspace preferences for the code-formatting and other conventions we'll use for this course:
Open the preferences configuration dialog box: From the "Window" menu in Eclipse, choose "Preferences".
On the left side of the Preferences dialog, expand "Java".
Specify how code should be formatted:
Specify options for code generation:
Tell Eclipse about the convention of naming instance variables ending with _:
Since we'll be using Java 17, tell Eclipse to enforce Java 17 syntax rules:
Tell Eclipse to store compiled classes separately from source files:
Finally, click "Apply and Close" at the bottom of the Preferences window to apply the new settings and close the window.
Configure the workspace build path for JavaFX (which may be used by the support code provided in some assignments):
Open the preferences configuration dialog box: From the "Window" menu in Eclipse, choose "Preferences".
On the left side of the Preferences dialog, expand "Java".
Configure the Java 17 JRE with the VM options needed for JavaFX:
Configure the default Java 17 environment to be the one you just set up for JavaFX:
Finally, click "Apply and Close" at the bottom of the Preferences window to apply the new settings and close the window.
This section is meant as a tutorial — doing the steps outlined with reddish boxes (and not just reading them) is part of the lab.
Java development work is done using the Java perspective. Eclipse should open in the Java perspective by default, and should look similar to what is shown below.
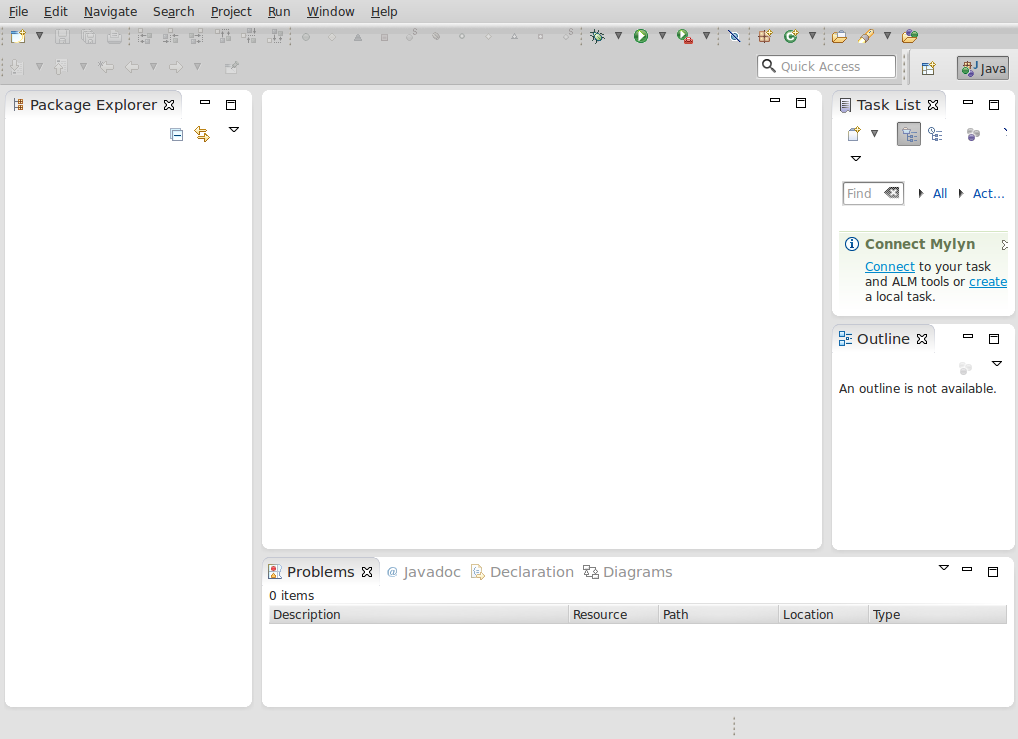
The first time you start Eclipse with a new workspace, it may display a welcome message. Close the Welcome tab if there is one. You should then see something like what is shown.
If your Eclipse window doesn't look like what is shown above, it may be in the wrong perspective. To switch to the Java perspective: choose "Window"→"Perspective"→"Open Perspective"→"Java (default)". If you don't see "Java (default)" as an option, instead choose "Other..." and then choose "Java (default)" from that list and click "Open".
If your Eclipse window still doesn't look right, ask for help.
There are four basic steps to creating a program using Eclipse: creating a project to contain your program's files, creating a main program, writing some code, and running the program.
Create a project:
Choose "File"→"New"→"Java Project". (Make sure you choose "Java Project" and not "Project...".)
Enter the desired project name (for this lab, lab1 — note all lowercase and no spaces).
In the "JRE" section, leave the "use an execution environment JRE" checked but select "JavaSE-17" from the list.
Uncheck "Create module-info.java file" near the bottom of the dialog.
Click "Finish". If you are prompted to create a module-info.java file, you forgot to uncheck that box in the dialog. That's OK, just click "Don't Create" now. (If you forget and one gets created anyway, just delete it once the project gets created — right-click on the filename in the Package Explorer and choose "Delete".)
Create a main program:
Right-click on the project name in the Package Explorer on the left side of the workbench and choose "New"→"Class".
Check that "Source folder" is projectname/src (in this case, lab1/src). Correct it if necessary (enter or browse to the correct path).
Make sure the "Package" is empty; delete what is there if necessary. (There will be a warning that the use of the default package is discouraged; it is OK to ignore that.)
Enter the name of the program in the "Name" box (in this case, call it HelloWorld — exactly as shown, with both caps and lowercase).
Check the "public static void main(String[] args)" box under "Which method stubs would you like to create?". (This will cause Eclipse to auto-generate the header for main so you don't have to write it yourself.)
Make sure that the "Generate comments" box is checked. (Select it if it isn't.)
Click "Finish".
Write some code:
Click on editor tab for HelloWorld.java, or double-click on the desired file in the Package Explorer to open it in an editor tab if there isn't one.
Edit the @author tag (in the comment at the beginning of the program) so it has your name rather than your username, or, if there is no @author tag, add one so that the comment looks like the following (with your name instead of Your Name):
   /**
    * @author Your Name
    */
Replace the TODO comment in main with a line of code to print the message "hello world!":
System.out.println("hello world!");
Run the program:
Right-click on the file containing the main program (in this case, HelloWorld.java) in the Package Explorer and choose "Run As"→"Java Application". The view at the bottom of the workbench window should change to the "Console" tab and the program's output should be displayed there.
As you type code, Eclipse tries to be helpful — it pops up warnings and suggestions for code completion, and puts all sorts of little markers and icons in and next to your code indicating syntax errors and other things. To further explore how Eclipse can help you find and fix syntax errors, do the following to your (working) hello world program:
Delete the final "n" in System.out.println so it reads just System.out.printl.
Delete the semicolon at the end of the System.out.println statement.
Add the statement
x = 5;after the System.out.println statement.
Delete the closing } of main.
As you make these errors (deliberately), notice that a squiggly red underline marks the location of a potential problem, red X icons in the left margin of the editor tab mark lines with errors, and several red rectangles in the right margin of the editor tab indicate the presence of errors within the file as a whole.
Save the file (with the errors).
You should notice that red Xs indicating the presence of errors now appear next to the file and the project in the Package Explorer.
Now, let Eclipse help you fix the errors:
Mouse over each of the red X icons in the left margin of the editor window. (Don't click, just move the mouse pointer and pause for a moment.) A message should pop up telling you what the error is. (Note that these are the same messages you would get if you compiled manually with javac. As with any compiler error message, they should be taken with a grain of salt — some syntax errors confuse the compiler so much that it doesn't know what the actual problem is.)
Click on the lightbulb with the red X (on the x = 5; line). This will bring up a list of possible fixes; clicking once on the one you want shows you what the fix will look like and double-clicking applies the fix to your code. Often the correct choice is at or near the top of the list, but not always — as with any error-fixing, make sure you understand what the actual problem is and how it should be fixed before making any changes. (In this case the correct option is to remove the assignment as it doesn't belong in the program.)
Repeat the process to fix the other errors. Since one syntax error can lead to a bunch of other phantom error messages, it is best to start at the beginning of the program instead of skiping around. Sometimes clicking on a red X won't bring up a list of fixes. In that case, you'll need to make the change yourself. It is not a bad idea to save the file after each fix to ensure that Eclipse notices the code has changed and recompiles.
Save the file. All of the error icons, both in the editor window and in the Package Explorer, should be gone.
Packages are an important way of organizing the potentially many classes within a program and Eclipse is eager to put new classes into a package. For now, however, using the default package is fine. (That's why you deleted the entry in the "Package" box when you created HelloWorld.)
If HelloWorld.java isn't listed under "(default package)" in the Package Explorer:
Drag HelloWorld.java to the "src" folder. (Alternatively you can delete the package line at the beginning of HelloWorld.java, save the file, and then choose the fix that moves the file to the default package.)
Delete the unwanted package in the Package Explorer.
Another handy feature in Eclipse is auto-formatting — so there is no excuse for handing in poorly-formatted code!
Deliberately make some "mistakes" in the whitespace (they aren't really mistakes, just violations of our preferred convention) — remove the indentation before a few lines or add extra indentation, put a line break after one of the dots in System.out.println, put a line break before the open curly bracket for main, add several blank lines in a row, etc.
Press Ctrl-Shift-F (or choose "Source"→"Format" from the menu) and watch everything be magically fixed! However, note that while multiple blank lines in a row are condensed, a single blank line isn't removed — it's common to deliberately use blank lines to visually group blocks of code.
Save the file.
Frequently auto-formatting your files helps with readability and can help reveal bracket-nesting errors.
You will typically make use of objects of many different types in a program, and the class definitions for each of the objects you want to use must be available to both the compiler (javac) and the runtime system (java). By default, the system looks for any classes that aren't part of the standard Java libraries in the same directory as the rest of your program — which, for Eclipse, means they are included in the same project.
Often you will be creating classes from scratch, but Eclipse also allows you to import existing files into a project. To do this:
Right-click on the project name in the Package Explorer and choose "Import..."
Expand the "General" tab and select "File System", then click "Next>".
Browse to the directory containing the file(s) you want to import. In this case, browse to /classes/cs225/lab1 and click "Open". (You'll choose the actual file(s) to import in the next step — this is a common point of confusion!)
Select the file(s) you want to import by checking their checkboxes. (You can browse through subdirectories of the import directories as needed by expanding things on the left side and clicking on a directory; select a directory checkbox on the left side to import everything in the directory or a file checkbox on the right side to import individual files.) In this case, select (just) Person.java.
Verify that "Into folder" is projectname/src (in this case, lab1/src) — if not, enter the correct name and/or browse to the correct directory.
Click "Finish".
Check that the imported file(s) ended up under "(default package)" in the Package Explorer. If it/they didn't, drag it/them to the right place.
Importing files like this copies them to your project directory — any changes you make will not affect the original copy.
Finally, modify the main program to make use of the Person class:
Add code to your HelloWorld program to create a Person object with your name and then print "Hello name!" (substituting the name retrieved from the Person object for name) instead of "Hello world!". For example:
   Person me = new Person("Alice");
   System.out.println("hello "+me.getName()+"!");
Save everything.
Run the program to make sure it works.
JavaFX is used for creating GUI programs. Actually programming with JavaFX won't be covered until later in the semester, but code may be provided as part of labs or programming assignments that uses JavaFX so you need to be able to run JavaFX programs. This takes a bit of setup because JavaFX is not distributed with the rest of the Java JDK.
Earlier in the lab you configured Eclipse to be able to find the JavaFX libraries on the system. Now you should test your configuration to make sure it works:
Import the file /classes/cs225/lab1/JavaFXDemo.java into your lab1 project. You are welcome to look at the contents of the file if you want, but don't worry about understanding any of what is there.
Run the program contained in JavaFXDemo.
If there are compiler errors after you import the file or runtime errors when you try to run the program, there is something wrong with your JavaFX setup. Double-check the last two steps in the Eclipse setup section above (the two that have to do with JavaFX) and if there are still errors, ask for assistance. If everything is well, running the program should pop up a window with several buttons that you can click.
Eclipse has an extensive online help system available through the "Help" menu. "Help"→"Welcome" is a good place to start for an introduction to Eclipse; "Help Contents" and "Search" are useful if there is something in particular you are looking for help with. "Dynamic Help" can also be handy — it brings up help topics associated with what you are currently doing.
Eclipse is a powerful tool, and does much more than has been described so far or that will be covered in this course. Feel free to explore and to experiment, either now or during the semester. A few things of particular interest:
There's more than one way to invoke many of Eclipse's functions. For example, many of the menu items that come up when you right-click on the project name in the Package Explorer are available from the menubar at the top of the workbench window. You can also right-click on other things, such as in the background of an editor window. There are also keyboard shortcuts for many things.
The "Basic tutorial", found under "Getting Started" in the "Workbench User Guide" (accessible from "Help"→"Help Contents"), takes you through many of Eclipse's features.
The environment is highly configurable. Check out the other preferences available ("Window"→"Preferences"), but you should avoid changing the Code Templates or Formatter settings (at least for this course).
The formatting tools described above are only some of what Eclipse can do. Explore the options on the "Source" menu to see what other possibilities there are — including automatically generating code as well as "Clean Up..." and "Sort Members..." operations. [These features will be more meaningful once we've discussed writing classes.]
Try out refactoring: if you want to rename a variable, parameter, method, or class, highlight the name in question, right click, and use "Refactor"→"Rename..." to automatically change all occurrences of that name.
Investigate Eclipse's assistance features — check out "Tips and Tricks" under the "Help" menu (select "Eclipse Java Development Tools" when asked).
To hand in your work:
Make sure all your Java files have been auto-formatted and saved.
Copy the entire project directory for the project you are handing in to your handin directory. The project directory will be inside your workspace — it should be ~/cs225/workspace/lab1 for this assignment — and your handin directory is the directory with your username in /classes/cs225/handin.
Check that everything got handed in correctly — navigate to your handin directory and make sure it contains a directory lab1, a subdirectory src, and the files HelloWorld.java, Person.java, and JavaFXDemo.java inside src.
See Working With Files and Directories to review what a pathname starting with / means, and to navigate the filesystem, copy files, and find /classes using the Files application. If you are working on your own computer (not using the Linux VDI), you'll need to use FileZilla to copy the files into the Linux filesystem. See Using Your Own Computer for more information.
It is recommended that you use the Linux VDI to access Linux remotely as that simplifies having to copy files across filesystems and means that your files are included in the regular system backups.
You will need to download and install three things: Eclipse, FileZilla, and JavaFX. (JavaFX is the trickiest part to set up. It will only be needed for some assignments, so an option is to skip JavaFX and just use Linux in those cases.)
Eclipse 2024-06 is recommended if you don't already have Eclipse installed on your computer, though any recent version should be fine. Choose the "Eclipse IDE for Java Developers" package (not the installer) from the download link, picking the right version for your computer.
Once you have Eclipse installed, create a workspace directory and repeat the Eclipse workspace setup steps. (Skip the Java 17 syntax rules and the JavaFX setup steps for now.)
You will also need to be able to copy files between your computer and the Linux filesystem in order to get provided code and to hand in your work. FileZilla is a free program you can use to do this. Download the FileZilla client (not server)!.
Once you start FileZilla, do the following to connect to the Math/CS department server:
If the connection is successful, you'll see two directory listings. On the left side, labeled "Local site", you'll see your computer. On the right side, labeled "Remote site", you'll see the Linux filesystem. To copy files, navigate to what you want to copy on one side and where you want to copy it on the other, then drag the file(s)/directories(s) from one side to the other.
As with the Linux VDI, you must be on the HWS campus network in order to connect with FileZilla. See the section about off-campus access in the Accessing Linux section above.
JavaFX is not part of the standard Java distribution. You can find download links here — download the right SDK (not jmods) for your computer and Java version. Eclipse 2024-06 includes a Java 21 JRE.
The downloaded SDK will be a compressed archive file. Double-clicking on the file will likely either extract the contents or open a program you can use to extract the contents. You can put the resulting directory (which will have a name like javafx-sdk-21.0.6, depending on the version) anywhere, but you'll need to know where you put it.
Do the JavaFX configuration steps from the Eclipse workspace setup, adjusted for your JRE version and where you put the JavaFX SDK directory. Come to office hours if you need help with this — it can be tricky to get right.