CPSC 441, Fall 2018
Lab 2: Mostly HTTP
On Monday, September 10, the class meets in Rosenberg 009 for our second lab. You should turn in your written work from the first lab at the beginning of Lab 2.
In this lab, you will be working mostly with the HTTP protocol, plus one general exercise and one using SMTP. You will find exercises throughout the lab. The first exercise requires you to do some setup work on your virtual machine. The second asks you to send an email message. The others are written exercises. You should turn in your answers to the written exercises at the start of lab next Monday.
Note that you can do the exercises in this lab in any order.
Your Web Server
You have control of a virtual machine at an IP address of the form 172.21.6.XX, for some number XX. Hopefully, you have already changed the root password for that VM. When I set up the virtual machines, I installed the software for a "LAMP" server, including the Apache web server, a mysql database server, and the PHP server-side programming langauges. We might never use mysql or PHP in this course, but we will do a bit with Apache.
Your web server is already visible on the web, but only on campus, at an address of the form http://172.21.6.XX for some number XX. It comes with a default home page. You should be able to access it now. I would like you to replace that page with some other content and learn a little more about the server in the process. The files that are served by Apache are in the directory /var/www/html.
The goal is to add a copy of my computer graphics textbook to the your web site. To do that, you can download a .zip archive of the web site and unzip it. A nice command line utility for downloading files from the web is wget, and a utility for unzipping a .zip file is unzip. Unfortunately, I didn't install those programs on your VM, so you should do it now. While you are at it, you might as well install w3m, the command line web browser. So, use ssh to log into your server as root, and give the command:
apt install wget unzip w3m
You will be asked to confirm that you want to install them. The necessary files will be downloaded from the Ubuntu Linux software repositories and installed.
Now that you have the tools, you can add get a copy of my graphics textbook and add it to your web site. Just cd into /var/www/html and copy-and-paste the following commands:
wget http://math.hws.edu/eck/cs424/downloads/graphicsbook-web-site.zip
unzip graphicsbook-web-site.zip
mv graphicsbook-1.2-web-site graphicsbook
The last command is to rename the directory to something simpler. Anyone on campus should then see my graphics textbook at http://172.21.7.XX/graphicsbook — and you can view it on the command line on your server with http://localhost/graphicsbook
The configuration files for the Apache web server are in the directory /etc/apache2. In particular, there are subdirectories mods-available and mods-enabled. "Mods", or modules, add features to the web server. If you list the files, you will see that there are a lot more available modules than there are enabled modules. One of the available modules is userdir, which allows Apache to serve files out of users' home directories. By default, the files that are served must be in a subdirectory named public_html in the user's home directory. Files in that folder will be visible at web addresses of the form http://172.21.6.XX/~username where XX is your assigned number and username is the name of the user. Note the "~" character before the user name!
I have an account on your VM with user name eck, and there is a public_html folder in my account. It can't be accessed on the web because the userdir module is not enabled. I would like you to enable that module. You can simply use the command
a2enmod userdir
and then do what it tells you to do to make the change take effect. You should then be able to view my page in a web browser.
Exercise 1: The first exercise is simply to configure your web browser as described here, so that it can serve my graphicsbook and the public_html directory in my account on your server. I will check that you have done this by accessing your server.
(This is not part of the assignment.) It's not considered to be a good idea to log into a computer as root, partly because it's much easier to mess things up drastically when you are working as root. If you would like to have a non-root account on your server, add it with a command like
adduser fred
where "fred" is the name of the new user. You will have to enter a password for the user, and you will be asked for some other information that you can omit. Of course, if "fred" wants to have a web site on your server, "fred" can create a folder named public_html and put the web files there.
If you want "fred" to be an administrative user, you can add "fred" to a user group named "sudo":
adduser fred sudo
Then after "fred" logs in, "fred" can execute commands as root using the sudo command. For example:
sudo apt install xorg nedit
or "fred" can become root with the command
sudo -i
(The install command in the above sudo example installs basic GUI support and the nedit text editor. This allows you to use GUI applications such as nedit remotely if you log into your VM from Linux using an ssh command with the "-X" option, such as "ssh -X fred@172.21.6.31". The nedit command runs an old text editor that doesn't send too much data when it is used over a network, so it is reasonably usable with a remote connection.)
The Standard SMTP Exercise
Exercise 2:
On Friday, we went over the process of sending email using the SMTP protocol
and the basic unencrypted and unsecured plain text format. The protocol is
also covered on pages 119 to 122 in the textbook. You should use the SMTP
protocol to send an email message to me, at email address eck@hws.edu.
It must arrive in my mailbox and it must say that it is "From" you and "To" me,
with a "Subject" saying that it is your response to this exercise. It should
also have some text in the body of the message. I will check the headers of
the message to see that it was actually sent from one of the lab computers.
I will reply to the email to let you know that I have received it. You can
send your email using telnet to smtp.hws.edu on port 25:
End the data for the message with a period on a line by itself, as
the book says, even though the server tells to do something different. (If you are not a great typist, note that you can compose your
email in a text editor and copy-and-paste it into the Terminal. You might want
to send a copy of the message to yourself by adding another "RCPT TO:" command
to your mail session.) Warning: Now that you know how to send fake emails, don't do it! Every time
a networking class is taught, someone seems to get in trouble by sending a stupid or
harassing or illegal email. Don't do it.telnet smtp.hws.edu 25
HTTP
The previous lab already noted that you can use telnet to connect to a web server and request a page. The allows you to see all the headers in the web server response, as well as the data in that response. You need to telnet to port 80 and type in the connection headers by hand, remembering to put in a blank line at the end of the headers. For example:
telnet  math.hws.edu  80
GET /index.html HTTP/1.1
Host: math.hws.edu
Connection: close
By the way, if you try to use "Connection: keep-alive", you might find out that the web server waits for another command after sending the response, but only a very short time. The connection will probably time out faster than you can type. (However, you could try typing multiple requests into a text editor and then copy-and-paste them all at once into the Terminal.)
Another way to see some information about the network communication involved in accessing a web page is to use the developer tools in a web browser. I demonstrated this in class on Friday. Note that a web browser can show you the content of encrypted HTTPS communication because, obviously, the browser had to be able to decrypt it!
And finally, of course, you can use Wireshark to display the packets from the HTTP protocol. One of the useful features of Wireshark is the ability to "follow an HTTP stream". If you right-click on an HTTP packet in the upper third of the Wireshark window, you get a pop-up menu. Go into the "Follow" sub-menu, and click "HTTP Stream". A new window will open showing everything that was exchanged between the client and the server during that HTTP session. The client transmissions are shown in a different color from server transmissions. This is an easy way to see the full conversation between the client and the server.
Exercise 3: Send web requests to math.hws.edu, www.hws.edu, slashdot.org, and at least one other site of your choice, and examine the response headers in each case. Determine what web server software each site is running, if that information is in the headers. HTTP responses can use "Content-Encoding" to cut down on the number of bytes that need to be transmitted. Did the web sites use content encoding in their responses? If so, what kind and how do you know?
Exercise 4: HTTP uses port number 80 by default, but an HTTP server can listen on a different port instead. The URL must then include the port number, for example: http://www.example.com:8008/index.html (this is not a working URL). Similarly, HTTP uses port 443 by default but can use any port; the clients would just have to use URLs such as https://www.example.com:8009. Suppose that a server listens for HTTPS connections on port 443, but you try to connect to post 443 using HTTP? Or, suppose that a server listens for HTTP connections on port 80, but you try to connect to that port using HTTPS. Try both of these with math.hws.edu and with www.hws.edu, using telnet and/or a browser. Report on how the servers respond.
HTTP Forms
A web form lets the user of a web page fill in some data and send that data to a server for processing. The data can be sent using either the GET method or the POST method, although large amounts of data can only be sent using POST.
The page at http://math.hws.edu/eck/forms.php contains four web forms. The first form has two inputs named "color" and "food." When the user clicks on the Submit button, the data from those two input boxes are sent to the server using GET. In the second form, the data from the "state" and "city" input boxes are sent to the server using POST. The third form lets the user select two files to be uploaded to the server, and also has one text input box. (Any files that are submitted will be discarded by the server.) The fourth form has to do with cookies. The data from the forms is submitted to the same URL as the page itself. The page is actually created by a program, written in the PHP programming language, that processes and responds to any data that is sent to it from one of the forms. When you submit one of the forms, the server will send back a copy of the same page, with a note about the data that was received added to the top. The next three exercises use this page to investigate how forms and cookies are implemented in the HTTP protocol.
Exercise 5: While monitoring network communication in whatever way you need to, use the first two forms on the page to send data to the server using the GET method and using the POST method. Use your observations to answer the following questions: How is the form data sent using GET and POST (that is, where is the data and how is it represented)? What happens if the value that is being submitted contains a space? What happens if the value that is being submitted contains a special character such as $ (a dollar sign)? What could you type into a telnet session to port 80 on math.hws.edu to send POST data to the server by hand, instead of by using the second form on the web page? Show the exact lines that you would type! (I suggest that you try it, and and make sure that you get the expected response.)
Exercise 6: Investigate and report on how the data for the third form is sent to the server. That is, when files are being uploaded as part of the data, how is the data formatted? You should try both text files and binary files such as an image or a Java .class file.
Exercise 7: Try using the fourth form to set a cookie in your browser. When you do that, the actual cookie is included in the server's response to your submission. How is the cookie sent from the server to the browser? You won't see the cookie listed at the top of the page in the response to your submission. Why not? However you should see the cookie the next time you use the page (and every time you use it within the next 30 minutes; these cookies are set to expire after 30 minutes). How and when does the browser send the cookie back to the server? You will see another cookie with name "PHPSESSID". What do you suppose that is?
Five Layers
Exercise 8: Examine an application-layer packet (such as from HTTP or SSH) in the middle section of the Wirehark window. Write a short essay discussing how the display in Wireshark reflects the five-layer Iternet protocol stack. This is an essay question. Write a well-organized essay in complete sentences and paragraphs.
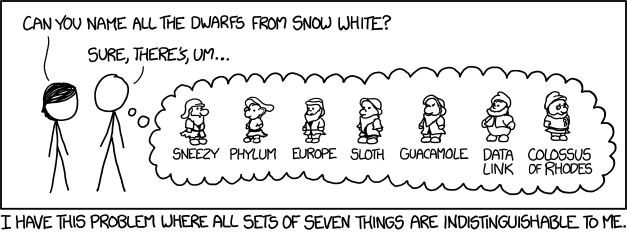
(Of course, there is also the seven-layer OSI protocol stack. Maybe you can fully explain this xkcd, including why I added it here? And can you do that without using explainxkcd.com?)