| CPSC 120 | Principles of Computer Science | Fall 2024 |
Labs are due at the start of class. It is OK if you show up and copy your files to the handin directory at the very beginning of class, but this should take at most a couple of minutes and you should not spend the next lab period finishing up the previous week's lab.
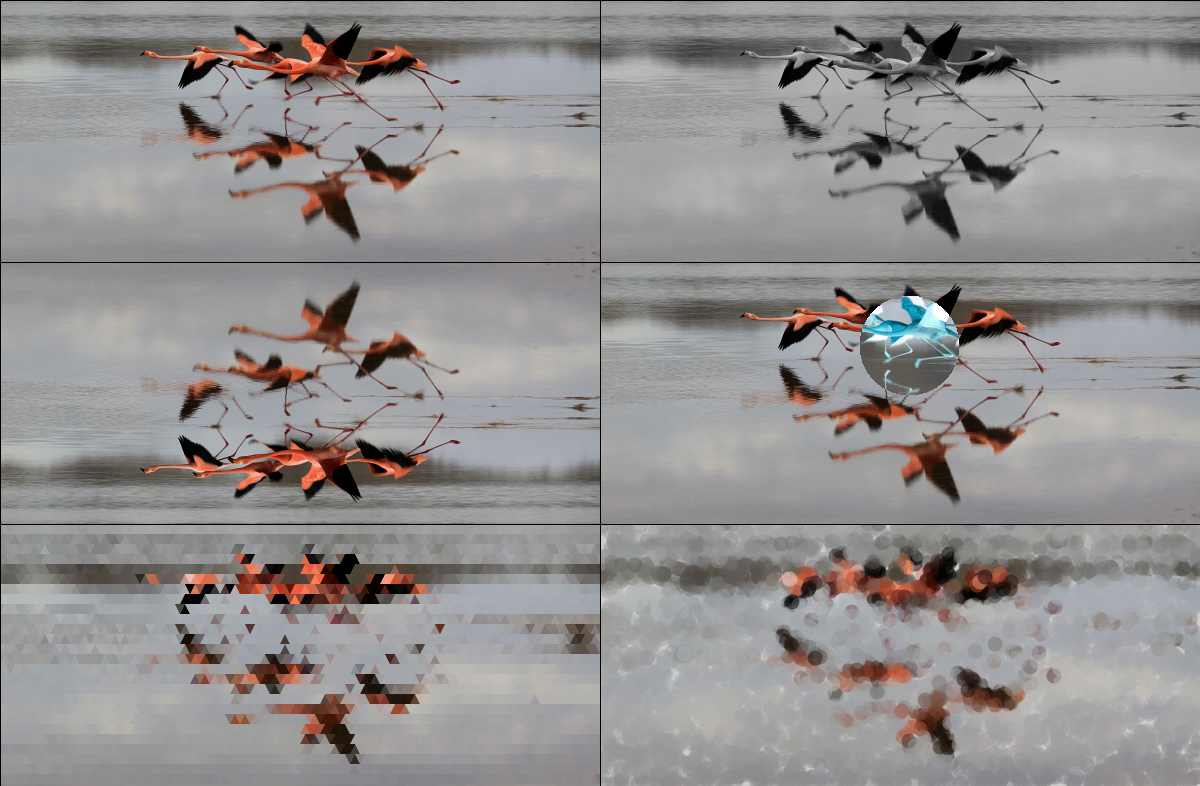
We've spent most of the course drawing our own pictures - but incorporating images can lead to interesting effects as well. Images can be used like painted movie backdrops, manipulated (like you might do in Photoshop) to achieve a new effect, or used as the basis for your own drawing (e.g. tiling the window with triangles whose colors are derived from the image).
In this lab you'll try out some image manipulation of your own.

Successfully completing this lab means that you are able to:
work with images in Processing
employ patterns of working with images
The short version:
Help with learning the process of constructing programs is fine; shortcutting the process and arriving at a result that you didn't produce yourself or don't fully understand how to produce is not.
Always attempt the problem yourself first, using this lab handout, the materials from class posted on the schedule page, and the assigned reading in the textbook.
Your primary resources for help should be office hours and the Teaching Fellows.
You may not work with other students to write code together.
You may not shortcut to a solution by copying code (except as specifically authorized in instructions) or using someone else's program as a guide or to understand what yours should be like even if you don't directly copy anything, You may not be in possession of someone else's program or solution before you have handed in your own.
You must document any help received (including from TFs) and any resources used other than the textbook and posted course materials. Put comments in your sketch indicating who helped (or the source used) and how / with what.
Make sure that you understand not only the result achieved, but also how one knows what to do to achieve that result. This gets at the process of writing a sketch — identifying what code elements are needed, filling in the details for a particular task, and pulling it all together.
Review the discussion in previous lab handouts and the full collaboration policy for more details.
To hand in your work:
Make sure that your name and a short description of the sketch are included in a comment at the beginning of each sketch.
Make sure that you've auto-formatted each sketch.
Copy the entire lab12a, lab12b, and lab12c directories from your sketchbook (~/cs120/sketchbook) to your handin directory (found inside /classes/cs120/handin).
Refer to the slides and examples from class for the patterns for using images as a source of colors (for the artistic effects) and for implementing image filters.
You might find yourself needing an int value when you instead have a float. You can do this conversion with typecasting:
(int)(...)
where the ... is the expression that you want to convert. For example, the following gets a random number between 0 and 100 and then converts the resulting value to an integer before storing it in x:
int x = (int)(random(0,100));
Casting a float to an int drops the fractional part of the value so if random(0,100) returned 83.67, the cast results in x getting the value 83.
The constrain function (look it up in the Processing API) can be useful for keeping values in a certain range (such as within a certain drawing area). You generally don't need to worry about constraining color values to be between 0 and 255 because the color function that builds a color will do that for you, but constrain might be useful in other cases, depending on what filters and effects you choose to implement.
Some of the artistic effects refer to "turning off smoothing" — this can be necessary to avoid slight gaps between adjacent shapes. To do this, put the statement
noSmooth();
in setup().
Put your name and a description of the sketch in comments at the beginning of each sketch. Also don't forget to Auto Format your code before handing it in. (Refer back to lab 2 for more on Auto Format if needed.)
Getting images to use —
If you are working on your own computer, images are available here — right-click on the filename and choose "Save Link As..." to save the images you want to use on your computer.
If you are working in Linux (either the virtual desktop or on an actual achine), you can find the same images in /classes/cs120/images.
You are also free to use other images but you must have permission for all images that you use. This means that the image is one of the provided images above, a picture you took or created, a picture someone else took or created and gave you permission to use, or an image that you found on the Internet that explicitly allows you to use it. There are many public domain images that are fine to use, but not every image is public domain! Include a comment in your sketch identifying the source for each image that you use. (Give the URL if the image came from the Internet.)
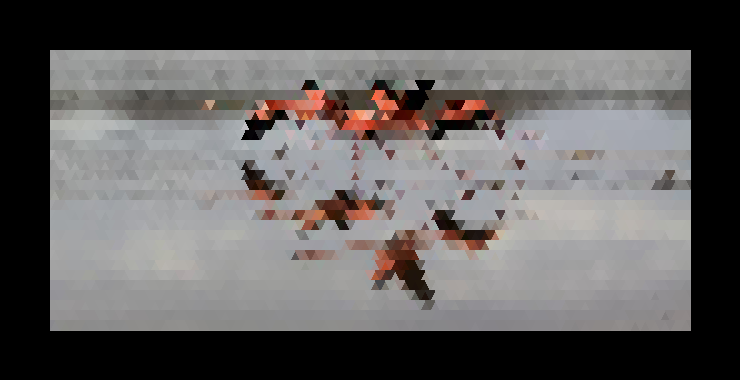
Your task is to create a sketch named lab12a which applies an artistic effect to an image. Choose one of the artistic effects described in the "Artistic Effects" section below.
Leave a border of the background showing as in the example. (The background can be any color; it doesn't have to be black.) Create a drawing function for the artistic effect.
To create this sketch:
Create a new sketch named lab12a.
Create a drawing function for your artistic effect — name it drawEffect (substituting the name of the effect for Effect) and include the parameters listed in the description below. For the body of the function, just draw the shapes — make them all the same color, though you may want to use different fill and stroke colors so that you can see the pattern.
Add code to the sketch to load the image and call your drawing function. Don't forget to also add the image file to your sketch with Sketch→Add File...
Modify the drawing function to instead take the shape colors from the image. Put the loadPixels() step at the beginning of your drawing function instead of in setup(). Refer to the slides and examples from class for the pattern and formulas for converting a point (x,y) in the drawing window to a pixel (row,col) in the image and then getting the color of that pixel.
Note: image filters will be covered in class on Monday 11/25 — wait until after that class to start on this exercise.
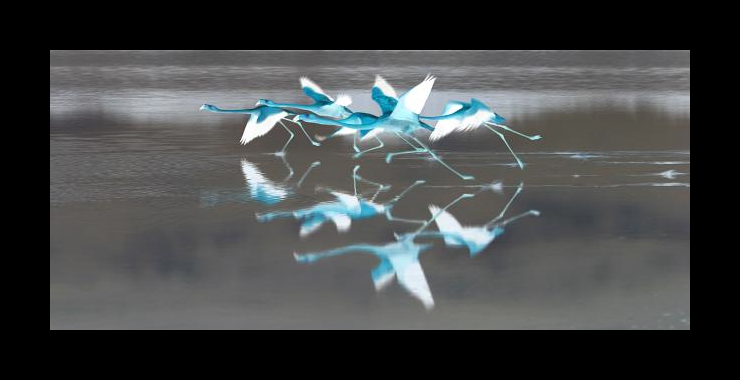
Your task is to create a sketch named lab12b which applies a custom image filter to an image. Choose one of the image filters described in the "Image Filters" section below.
Leave a border of the background showing as in the example. (The background can be any color; it doesn't have to be black.) Create a filter function for the image filter.
To create this sketch:
Create a new sketch named lab12b.
Create a filter function for your image filter — name it filter (substituting the name of the filter for filter) and include the parameters listed in the description below. The body of the function will be very similar to the brighten and green/blue swap filters from class — just the details of how you compute the destination colors will be different.
Add code to your sketch to load the source image, apply the image filter, and display the filtered image. Don't forget to also add the image file to your sketch with Sketch→Add File...
Create a sketch named lab12c which showcases several image filters and artistic effects. For full credit, your sketch must meet the following requirements:
It must be deliberately created. This means that the images are arranged or used in a way to create a particular effect, rather than just leaving things however they happen to end up. Something simple like the grid of 6 images in the example at the beginning of this handout is fine, or you can get more creative.
You must use and/or display at least six different images. This does not mean that you have to load six different images — manipulating an image by applying an image filter or using it as the basis for an artistic effect (even if the image itself is never actually drawn on the screen) counts as a separate usage. However, simply displaying the same image multiple times (even if different sizes) does not count as multiple images.
You must display at least one image with a size different from its original size.
You must use tint.
You must implement at least two different image filters and one artistic effect. You can copy your drawing and filter functions from #1 and #2 so you only need to implement one additional image filter for this exercise. Choose from the list in the "Image Filters" section below.
Each artistic effect and image filter must be implemented in a separate drawing or filter function.
You must have permission for all images that you use and the source must be credited. See the introduction to the exercises above.
You can earn extra credit by implementing additional image filters and/or artistic effects. There are lots of interesting things you can do with images! Some possibilities:
Vary the effect of the filter across the image, such as to simulate vignetting (which darkens the image near the edges).
Vary the effect of the filter or effect across the image in response to interaction, such as having the center of the vignetting be the mouse position instead of the center of the image or only applying the filter in the area near the mouse. Another possibility would be vary some aspect of a filter or effect in response to interaction, such as having the angle of the lines in the pencil sketch always point towards the mouse.
Review section 15.5 in the book and manipulate pixels drawn on the screen instead of pixels that come from an image. A possibility would be to allow the user to draw with the mouse, then apply an image filter to that (or use an artistic effect) when the user clicks the mouse.
Implement a filter which distorts the image or moves things around rather than changing colors as such. Possibilities include flip, rotate, scale, crop, diffuse, ripple, shear, and tile — see the "Distortion and Warping Filters" section here for examples of those effects. See me if you are interested in pursuing some of these options but need more information.
Check out section 15.9 about image filters where the color of the destination pixel depends on more than one source pixel. The book has examples of sharpen and a simple edge detect, so you need to do something else such as blur, a more sophisticated edge detect, or emboss (an example of the effect). You can also try effects like setting a pixel to maximum value of the neighboring colors, or the minimum value. Or you can combine things, such as combining a version of edge detect with the original image to get a cartoon sort of effect. See me for more information if you are interested in exploring some of these possibilities.
Come up with a filter or artistic effect of your own. (Another possibility is an interesting generated image — other than the simple gradient and random colors discussed in class.) To get credit for something of your own, your function comment should include some description of the effect — you should demonstrate that you understand why the effect is what it is. You won't get credit for some random effect you happened across by accident if you can't explain what's going on.
More creative and challenging elements will earn more points.
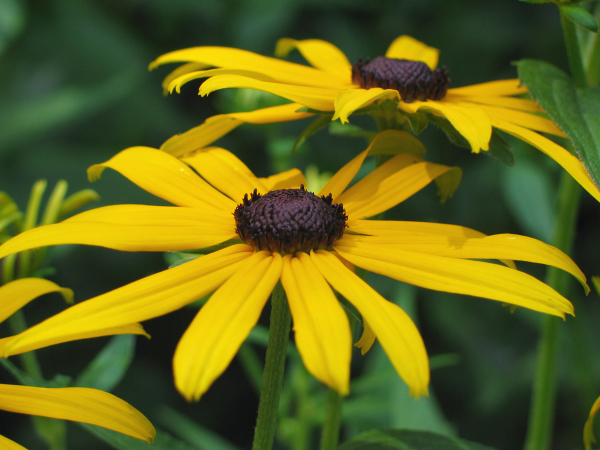
An "artistic effect" consists of drawing a pattern of shapes whose color is drawn from an image. The image itself isn't actually drawn on the screen.
Create a drawing function for each artistic effect. The drawing function should have parameters listed.
Each effect is illustrated using the image shown to the right as the source image. Click on the images for a larger version.

An image filter produces a new image whose pixels are transformed in some way from the original image.
Create a filter function for each image filter. The function should have parameters listed and should create and return a new image for the filtered image.
Each filter is illustrated using the image shown to the right as the source image. Click on the images for a larger version.