| CPSC 124 | Introduction to Programming | Spring 2024 |
This lab will introduce you to the computing environment used in CS courses at HWS.
Successfully completing this lab means that you have correctly set up your account for use in this course and will be able to:
This handout contains a lot of information. Don't worry about memorizing all of the details right now! Make sure you understand the material as you work through the lab, but the main thing is to be aware of what information there is so that you can come back and look up the specifics when you need them.
To distinguish between informational instructions (telling you how to do something) and steps you should actually carry out to complete the lab, steps are marked as shown below.
This handout is meant to be read in order, from beginning to end, and the boxed steps should be done as you encounter them. However, you should look through each section or subsection in its entirety before beginning to actually carry out any actions contained in that section, so that you understand the context of what you are doing and also so that you notice if there are important explanatory details about a particular step written after the step itself.
Ask if you're not sure how to do something, or if what you do doesn't seem to work correctly (for example, you get an error message and you aren't sure why). Computers demand that you get every detail of each command exactly right in order for it to work, and those details can be pretty small - even just whether something is capital vs lowercase.
You should still read carefully through the whole handout even if you have used Linux before, as you might not be familiar with the specific things you will need to use in this course. You will also need to do boxed steps in order to be ready for this course.
Make sure you have read and understand how academic integrity applies in this course (and specifically how it applies to labs).
For this lab, all of the marked steps must be done by each person individually, and everyone needs to be able to navigate the Linux environment for themselves. It's fine to give and receive help, and even to go through the steps collaboratively with someone else, but everyone needs to actually carry out the steps and be able to navigate the Linux environment for themselves.)
For the questions in the exercises, the usual collaboration rules apply: help (such as a hint about where to find the information) is fine, but you may not work together with others to answer the questions.
Labs are due at the start of lab on the date listed. It is OK to take a few minutes at the beginning of lab to hand in the previous lab, but you should not be spending part or all of a lab period finishing the previous week's lab.
Computer science courses at HWS make use of an operating system called Linux. An operating system is the basic software that runs the computer - it controls the hardware of the computer (such as disks and memory) and runs application software (like word processing programs and web browsers). It is the first thing loaded when the computer starts up. You are most likely already familiar with the Microsoft Windows operating system (Windows 10 and 11 are the most recent versions) and/or the Macintosh operating system (macOS Sonoma and Ventura are the most recent versions). Linux is a version of Unix, an operating system often used for servers and in academic environments. One reason for Linux's popularity is that it is free and open source, meaning that not only can you download and run it for free, the underlying code is available to anyone to add to and modify.
There are actually many different versions of Linux, known as distributions. You'll encounter two different distributions in this course: the computers in the labs run a version called Linux Mint, while the VDI environment uses Ubuntu. All versions of Linux work the same way underneath, but different distributions may look different or be configured differently.
There are two ways to access a Linux desktop at HWS: in the Rosenberg 009 and Lansing 310 computer labs, and through the Linux VDI (Virtual Desktop Interface). This section will only address using the lab computers.
The computers in Lansing 310 run only Linux. If the computer is off, you'll need to turn it on and wait for it to boot, but otherwise, when you sit down at one of those computers you should see the Linux login screen.
The computers in Rosenberg 009 are dual-boot, meaning that they are configured to run both Windows and Linux. Only one operating system can control the computer at a time, so if the computer is off or running Windows when you sit down, you will need to reboot it to switch to Linux:
Restart the computer by pressing ctrl-alt-delete to get to the Windows login screen, then use the small "power button" menu on the bottom right and select "Restart". (Or, if the computer is off, turn it on.)
As the computer restarts, you will eventually see a screen with a menu that allows you to choose between Windows or Linux.
Linux is the default option, so you can either just wait a few seconds for the computer to continue to boot on its own or you can make sure the first item on the menu is highlighted (use the up and down arrow keys to make a new choice if needed) and press the Enter key.
Wait some more, and eventually you will get the Linux login screen.
Get to the Linux login screen on the computer you are sitting in front of. (Reboot if needed.)
You will be provided with a username and password in lab. Note that while your Linux username might be the same as your HWS email login, this is a separate account from your HWS network account and has a separate password. (This also means that if you change the password for one account, it will not affect the other.)
[Side note: if you were in CPSC 120 last semester, this is a new account with a lowercase username. Use this account going forward, as the uppercase-username accounts created last semester will eventually be removed. Stop by office hours for help with moving files you want to keep from your old account to this one.]
At the Linux login prompt, enter the username and password you were given. (Both are case-sensitive, so be careful to get any capitalization correct.) Do not make any other modifications or selections on the login screen.
It may take a little while for the desktop to start up, especially the first time you log in. You may also get some windows popping up with welcome information or tips about configuring your desktop. It's OK to close or otherwise dismiss those windows (ask if you get one that you aren't sure about). If you don't want the pop-ups every time before you log in, look for a little checkbox you can select to turn off this behavior before dismissing the window.
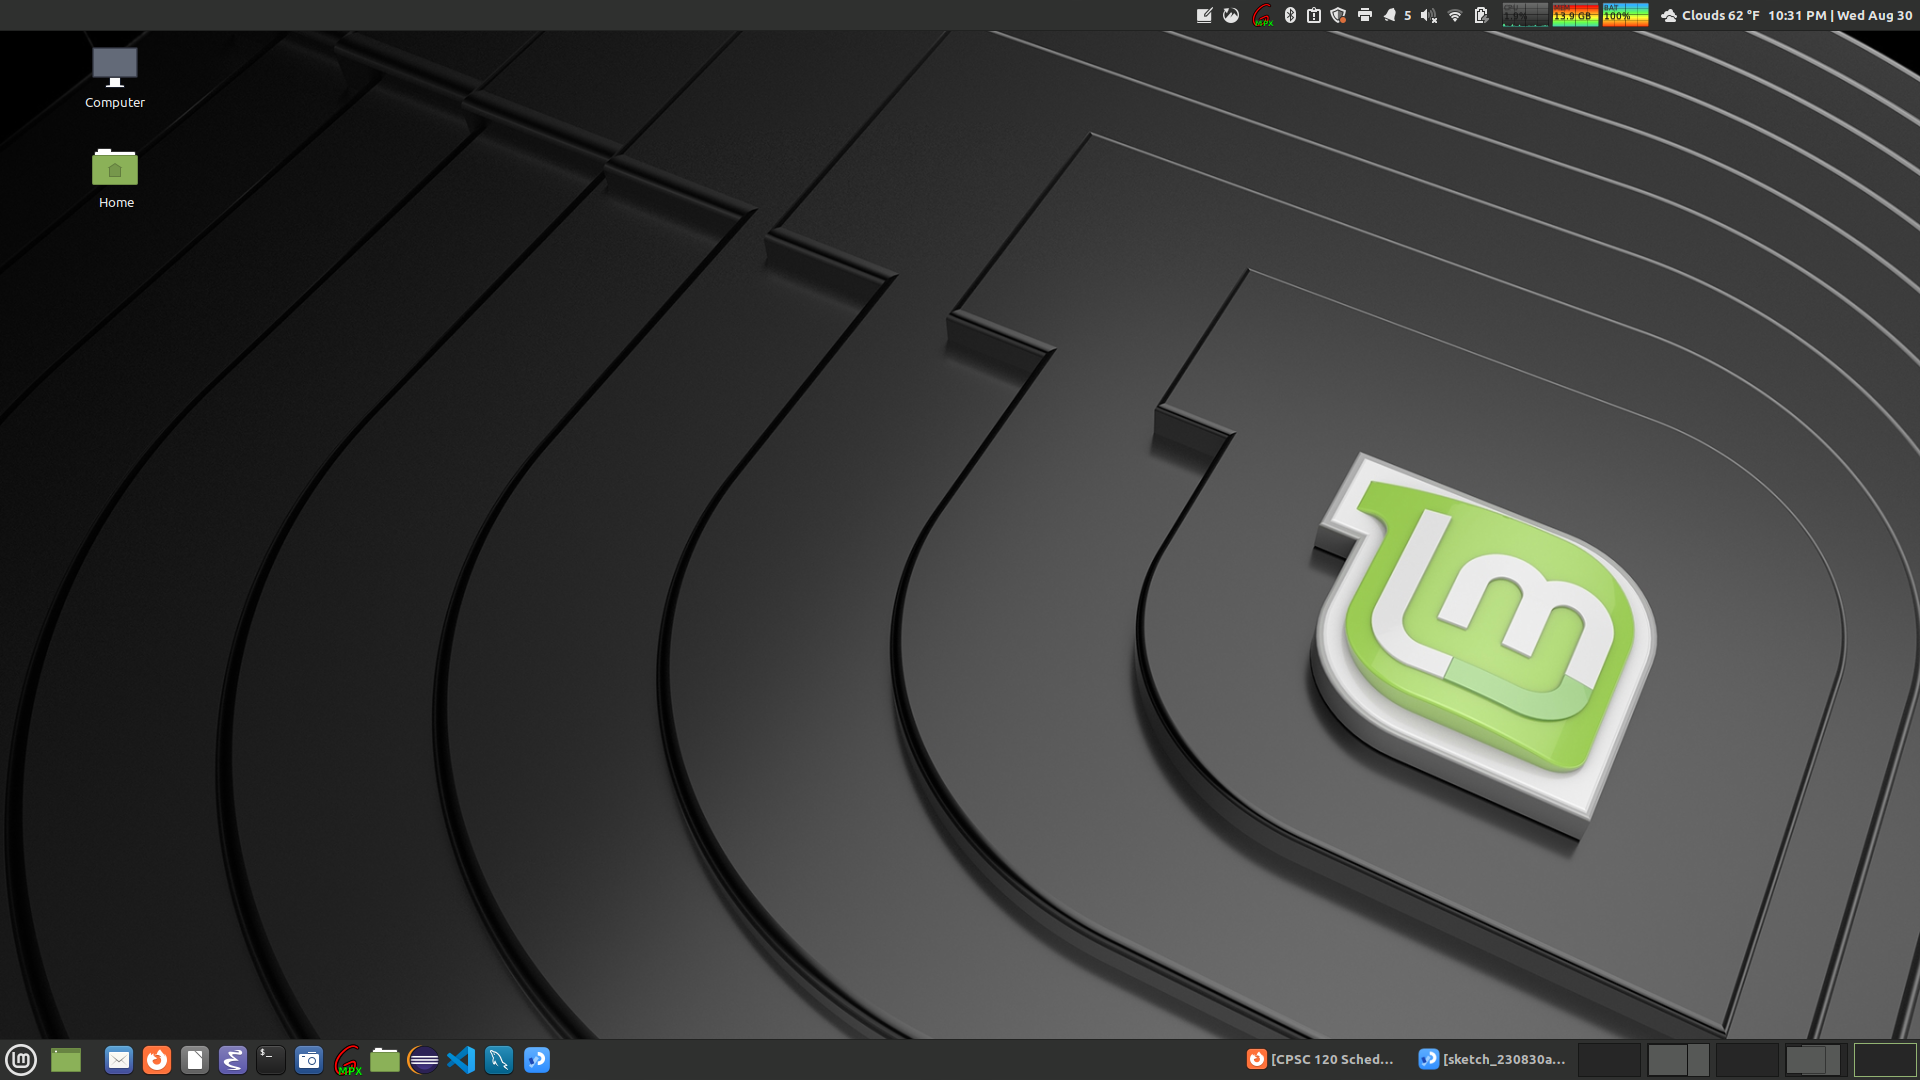
You should end up with something similar to the following: (though your desktop probably won't look exactly the same - there are lots of things you can customize)
Unlike Windows and MacOS, where the desktop that you interact with is bundled with the rest of the operating system, Linux supports many different desktops with different features and appearances. (There can even be different desktops available within a single Linux distribution.) The desktop used with Linux Mint at HWS is called Cinnamon.
The Cinnamon Desktop is most similar to the desktop in Microsoft Windows, but there a number of things in common with both Windows and MacOS - as you explore Cinnamon, keep in mind what you already know about other systems to help you figure things out.
The bar running across the bottom of the screen is known as the panel; Windows calls it the taskbar.

The panel can be configured to your liking, but it commonly has the elements described below. (Again, what you see may be a little different than what is shown, but you can mouse over the icons you see to get popup text describing what each is for to help you figure things out.)
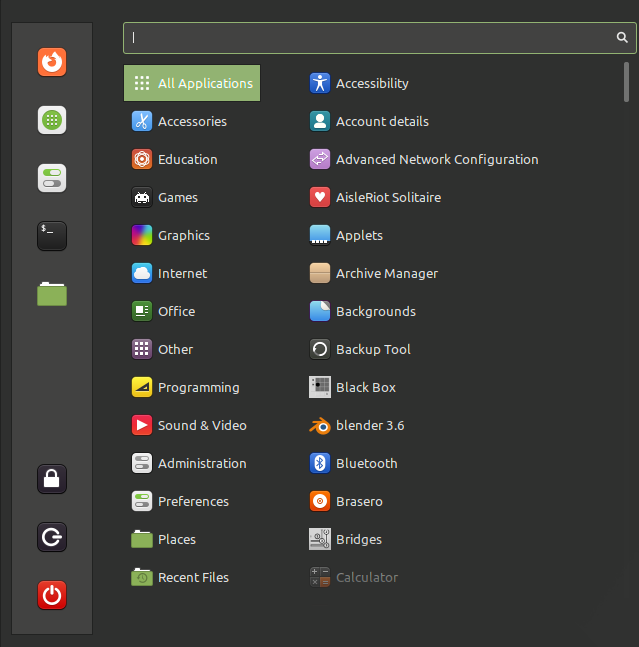
On the far left of the panel is the Menu
icon ![]() . Clicking this
brings up the Applications menu, shown to the right.
. Clicking this
brings up the Applications menu, shown to the right.
There are two groups of icons stacked vertically on the left side of the Applications menu - the icons at the top provide shortcuts for some common applications and settings and the icons at the bottom provide system actions like logging out, locking the screen, and shutting down or rebooting the computer.
To the right of those icons is a list of categories. Mouse over or click on a category to bring up the list of available applications in that category. Click on the desired application to launch it.
You can also start an application by going to "All Applications" category and looking for what you want, or by typing the name of the application in the search box at the top of the Applications menu.
It's worth exploring the Applications menus bit when you have time - lots of things are available. (Of particular note - the Firefox web browser, LibreOffice (similar to Microsoft Office), and GIMP (image-manipulation software similar to Photoshop); "Preferences" contains many things you can configure to customize the environment.)

To the right of the Menu icon in the panel are icons for launching common programs such as Firefox (second from the left in the picture). Click to launch the desired application.
To the right of the launchers are tabs showing the currently-open windows. These may show an icon along with some of the window's title or just an icon depending on how many windows you have open. Click to toggle restoring/hiding the window or right-click for a menu of operations.

At the far right end of the panel, or in a panel across the top of the desktop, there is often a clock and some icons for controlling settings such as sound volume. Mouseover for a popup describing the icon (or providing some information). Usually clicking brings up something related to the tool's functionality while right-clicking results in a menu with options related to configuration.

Finally, on the desktop itself, you may see two icons labeled "Computer" and "Home" in the upper left corner - these provide access to your files. (More on that later.)
When you are done working, it is important to log out - this allows others to use the computer, and also protects your account and files from others who might come along.
Bring up the Applications menu.
Click the "log out" icon ![]() (along the left side of the menu), then choose "Log Out" to actually
log out. (For now, cancel instead of actually logging out.) Remember
that you can mouse over icons for a popup description if you need to
identify what an icon is for.
(along the left side of the menu), then choose "Log Out" to actually
log out. (For now, cancel instead of actually logging out.) Remember
that you can mouse over icons for a popup description if you need to
identify what an icon is for.
To save paper, the remainder of this lab and all other labs for the course will be only posted online.
Start up Firefox (a web browser) by bringing up the
Applications menu and clicking on the Firefox
icon ![]() . If it isn't there, look for the
category "Internet" and then click on "Firefox Web Browser" within
that category. Alternatively, you can type "firefox" in the box at
the top of the menu window, then click on "Firefox Web Browser" when
it appears.
. If it isn't there, look for the
category "Internet" and then click on "Firefox Web Browser" within
that category. Alternatively, you can type "firefox" in the box at
the top of the menu window, then click on "Firefox Web Browser" when
it appears.
Once Firefox starts up:
Go to the main course page at http://math.hws.edu/bridgeman/courses/124/s24/, navigate to the schedule page, and look for the lab 1 link.
You should change the random password you were assigned to something only you know and which is easier for you to remember. You can use the same password as your HWS network account if you want or something different. (Just remember that your CS account is separate from your HWS network account, so changing the password for one does not affect the other.)
You can use any characters except spaces in your password - you should avoid real words (including real words spelled backwards), and use a mix of letters and non-letters. Also, your password is case-sensitive, so make sure the "Caps Lock" key isn't on unless you mean for it to be.
To change your password, you'll need to make use of the command line. As with Windows and Mac, much of your interaction with Linux can happen by clicking on icons and menus. However, some tasks - like changing your password - can't be done this way and instead require you to type in the command you want to run. (Both Windows and Mac also provide a command line interface - perhaps you've used it.)
To access the command line, you need to open a terminal window:
Open the Applications menu and: click the "Terminal"
icon ![]() on the left side or go
to the "All Applications" section and locate the application
called "Terminal" or type "terminal" in the box at the top
of the menu and choose the application called "Terminal".
on the left side or go
to the "All Applications" section and locate the application
called "Terminal" or type "terminal" in the box at the top
of the menu and choose the application called "Terminal".
To change your password:
In the terminal window, type the command
passwdand press Enter.
When prompted, enter your current password (the random one given to you) and then your new password (the one you want). Press Enter each time. You'll be prompted for your new password twice to protect against typos. Note that nothing appears on the screen as you type your passwords! - don't worry, it's working. (Not showing anything on the screen is a security measure to keep someone looking over your shoulder from seeing your password.)
If your password was successfully changed, you should see a message to that effect after you press Enter the last time.
Close the terminal window by clicking on the X icon in the upper right corner of the window, or by typing the command exit on the command line (followed by pressing Enter).
As in any operating system, files in Linux are organized into folders (often called directories in Linux). Each folder can contain files and/or subfolders, which in turn contain files and/or subfolders, and so forth.
Cinnamon provides a tool similar to the Windows File Explorer or the macOS Finder for navigating directories and managing files and folders.
To start the file manager:
Open the Applications menu and click on the Files
icon ![]() on the left side. There may also be a
similar icon in the launcher section in the panel (click on it),
or you can double-click on the "Computer" or "Home" icons on the
desktop if you have those.
on the left side. There may also be a
similar icon in the launcher section in the panel (click on it),
or you can double-click on the "Computer" or "Home" icons on the
desktop if you have those.

To open a folder, you can double-click on a folder icon as you would in Windows or on the Mac.
For a file or directory, the sequence of directories containing that file or directory is known as its path. The file manager shows the path for the directory shown in the current view near the top of the window. Click on a folder name in the path display to jump to that folder.

You can back up to a previously-viewed folder by clicking on the back
arrow ![]() in the upper left corner of
the file manager window.
in the upper left corner of
the file manager window.
You can also go straight to certain directories by clicking on one of the entries displayed in the "My Computer" and "Bookmarks" sections on the left side of the file manager window.
You have a home folder (or in Linux terminology a home directory), which contains your personal files. (This is similar to "My Documents" in Windows.)
To go to your home directory:
Within the file manager, click on the item
"Home"  (under "My Computer") on the
left side of the file manager window.
(under "My Computer") on the
left side of the file manager window.
If the directory currently being viewed in the file manager is contained within your home directory, you can also go to your home directory by clicking on the house icon (also labeled with your username) in the path display.
Note that while everyone has a home directory, each user has their own home directory. (My home directory is not the same directory as yours!)
Another special directory is the root directory. This is the directory at the top of the file system - all other files and folders are contained, either directly or indirectly, within the root directory. In other words, you can start at the root directory and repeatedly open subfolders to reach any other file or folder on the system.
To go to the root directory:
Within the file manager, click on the item "File System"
 (under "My Computer")
on the left side of the file manager window.
(under "My Computer")
on the left side of the file manager window.
You can also get to the root directory by looking for a similar icon in the path display. (If the first element of the path display has the home icon, click on the left arrow on the left end of the path display.)
For some special directories, like the root directory and your home directory, you can simply say "the root directory" or "my home directory" and people know what you are talking about. However, for other files or folders, the only way to specify which thing you are talking about is to explain how to find it - and it is useful to have a concise way of writing down this explanation. The exact representation varies from operating system to operating system, but Linux concatenates the names of each folder from some starting point to the folder containing the item, putting a slash (/) between each folder name. This is known as the path to the item. For files, the name of the file is appended to the path.
The root directory has a very short path: / (just a slash).
The path for your home directory is /home/username, where username is your actual username, not the word "username". (For example, my home directory is /home/bridgeman.) This means that your home directory is in a folder called "home" which is in the root directory (indicated by the / at the beginning of the path).
(Technically the full path for your home directory is /afs/afs.hws.edu/home/username, but /home is a link to /afs/afs.hws.edu/home - a link is like a shortcut in Windows. You can ignore this, just don't be surprised if sometimes you see /afs/afs.hws.edu at the beginning of a path name.)
Since your home directory is a common thing to refer to, there's also a special shortcut notation that can be used to refer to your own home directory: ~ (a tilde).
A second shortcut can be used to refer to a particular user's home directory: ~bridgeman, for example, refers to the user bridgeman's home directory (i.e. mine). You could also refer to your own home directory by putting your username instead of "bridgeman" (but leave the ~ in there exactly as shown). It would also be fine to use the path /home/bridgeman instead of ~bridgeman to refer to my home directory.
Note: details matter! ~bridgeman means bridgeman's home directory while ~/bridgeman means the directory called "bridgeman" within your own home directory.
/classes/cs124 will contain files that you need for labs and projects, as well as the folder where you will hand in your programs.
Navigate to /classes/cs124 using the file manager to see what is there.
Navigate to /classes/cs124/handin and locate your handin directory - a folder labeled with your username - using the file manager.
To create a new folder, navigate to where you want the folder to go, then right-click on the background of the file manager window and choose Create New Folder from the popup menu. (Be careful not to right click on any particular file or folder.) This will create a new folder called "Untitled Folder", with the folder name highlighted and ready for editing - type in the new name.
To keep things organized, you should create some directories to hold the files you'll create for this course:
Create the directory ~/cs124. (Remember what that path means - a directory called cs124 inside your home directory.) Be sure to name the directory exactly as shown - use lowercase for "cs". Unlike Windows, Linux is case-sensitive so cs124 and CS124 are two different directories. You should be careful to observe the case of things when typing in names. Also make sure there's not a space between "cs" and "124".
Create the directory ~/cs124/lab1 to hold files you will create as part of this lab.
Names are case-sensitive - capitals and lowercase are different.
Stick to alphanumeric characters (letters and numbers) and the symbols - (dash) and _ (underscore). Some other characters, such as spaces, are legal to include but require special handling when using the commandline, which causes problems when I am printing your programs for grading. Please don't use spaces in file and directory names!
To rename a file or folder, right click on the item you want to rename, select "Rename...", and type in the new name of the file. Make sure you include the appropriate extension (e.g. ".txt" with text files).
You can select files and folders like you do in Windows - click on a file or folder to select just that item, or click on a file or folder and then shift-click on another file or folder to select the range of items between the two, or click on a file or folder and then ctrl-click on others to include them, or click in the background of the file manager window and drag to select all of the files/folders in a region.
To move files and folders from one place to another, you can open two file manager windows, navigate to the folder containing what you want to move in one and the target location in the other, and drag the file(s)/folder(s) from one window to the other.
You can also select the item(s), cut or copy, navigate to the target folder, and paste to move or copy files. Access cut/copy and paste by right-clicking on a selected item (cut/copy) or in the background of the file manager window (paste).
To delete file(s) and/or folder(s):
Select the desired item(s) in the file manager.
Either right-click on one of the selected items and choose "Move to Trash", or just press the delete key.
Both of these options cause the selected item(s) to be moved to the
trash. The trash can be accessed via the Trash
item  on left side of file manager window
if you want to restore an item or empty the trash. (There is another
menu item "Delete" - using this instead of "Move to Trash" causes the
item to be removed immediately. Use this option with caution, since
you can't restore an item deleted in this way.)
on left side of file manager window
if you want to restore an item or empty the trash. (There is another
menu item "Delete" - using this instead of "Move to Trash" causes the
item to be removed immediately. Use this option with caution, since
you can't restore an item deleted in this way.)
Programming in Java involves three steps: creating a file containing the text of the program, compiling the program to translate the Java instructions to a lower-level language that is closer to something the computer can actually run, and then actually running the program.
In order to create or edit a Java program, you need to use a text editor. Text editors are different from word processors like Microsoft Word because they are only concerned with editing plain text - they don't do all the formatting with fancy fonts, colors, tables, pictures, and all the things you can do in Word.
Text editors intended for use by programmers often provide additional useful features:
syntax coloring - Different parts of the program text are colored with different colors and/or are displayed with different font styles. This is because those parts have different jobs in the program. Syntax coloring can make the program much easier to read.
paren matching - When you type a close paren, square bracket, or curly bracket, the editor automatically highlights the open symbol that matches it. You'll be using these symbols a lot in your programs, and it is important to make sure they are properly matched.
automatic indentation - The lines of a program are typically indented in certain ways. This is a convention used to make a program easier to read. Besides aiding with readability, automatic indentation is a very useful feature as you learn what the indentation conventions are, because if something is indented incorrectly, it is often a sign of a syntax problem such as unbalanced parens or a forgotten semicolon.
auto-formatting - This goes a step beyond just indentation and adjusts spacing, line breaks, and other formatting to follow standard conventions for programming. This makes the program code easier to read and can also help catch problems like missing semicolons or unbalanced parens and brackets.
autosave and/or automatic backups - Autosave means the editor saves periodically while you are working (using a special "autosave" file) so you won't lose too much if the computer crashes. Automatic backups means that each time you save, you'll also get a backup of the last saved version.
We will be using a tool called VS Code for Java programming. This tool is freely available, multi-platform (so you can run it on Mac and Windows, as well as Linux), and provides the useful features just mentioned. Actually, VS Code goes far beyond these basic features, aiming to build a full - and highly configurable - integrated development environment providing many tools useful for developing larger software projects and supporting many different programming languages. We will be ignoring most of those elements for this course.
To start VS Code:
Open the Applications menu, go to the Programming submenu, and look for "Visual Studio Code".
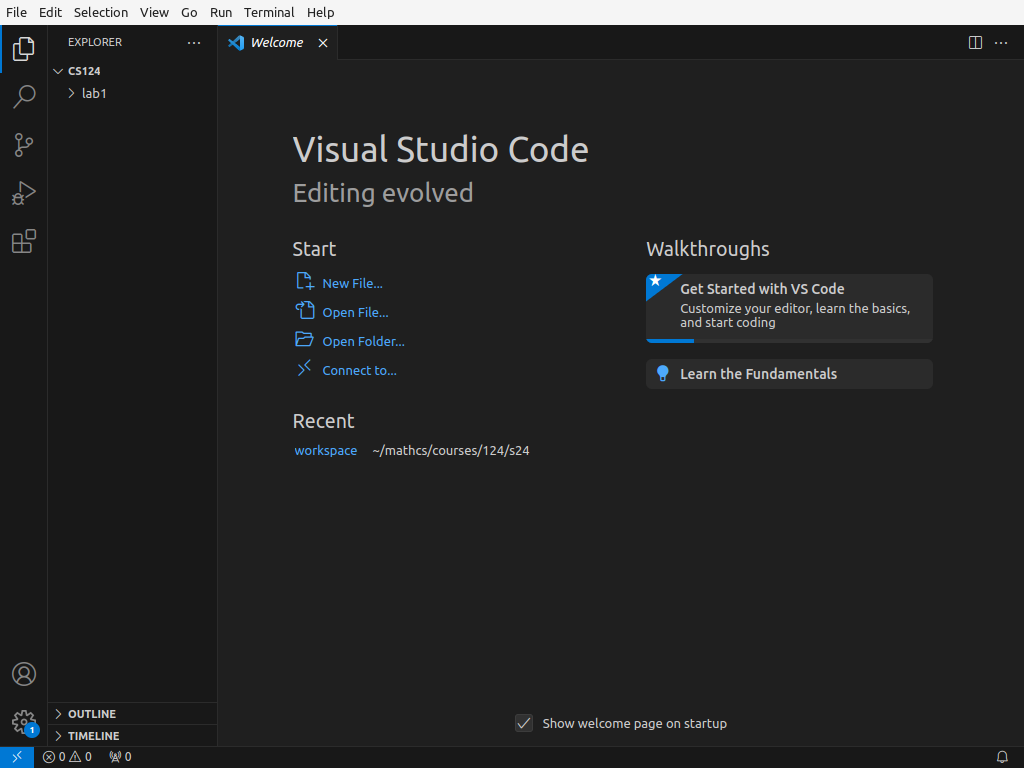
When you start VS Code for the first time, you'll see a welcome screen offering some customization options.
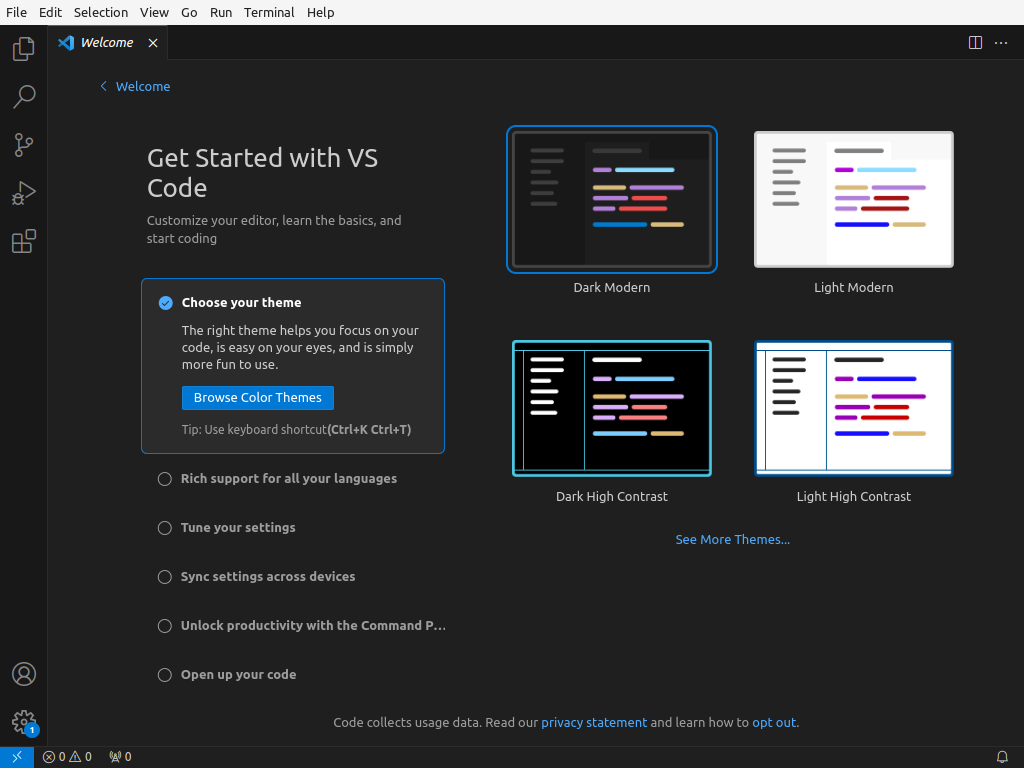
Go ahead and close the welcome tab.
VS Code is designed to be highly extensible so that it can support a wide variety of programming uses. For this course, we will use an extension that provides auto-formatting and some other convenient features for Java programming.
To install the Java language support extension:
Go to the View menu and choose Extensions.
In the search box, type "red hat java".
The top match should be "Language Support for Java(TM) by Red Hat".
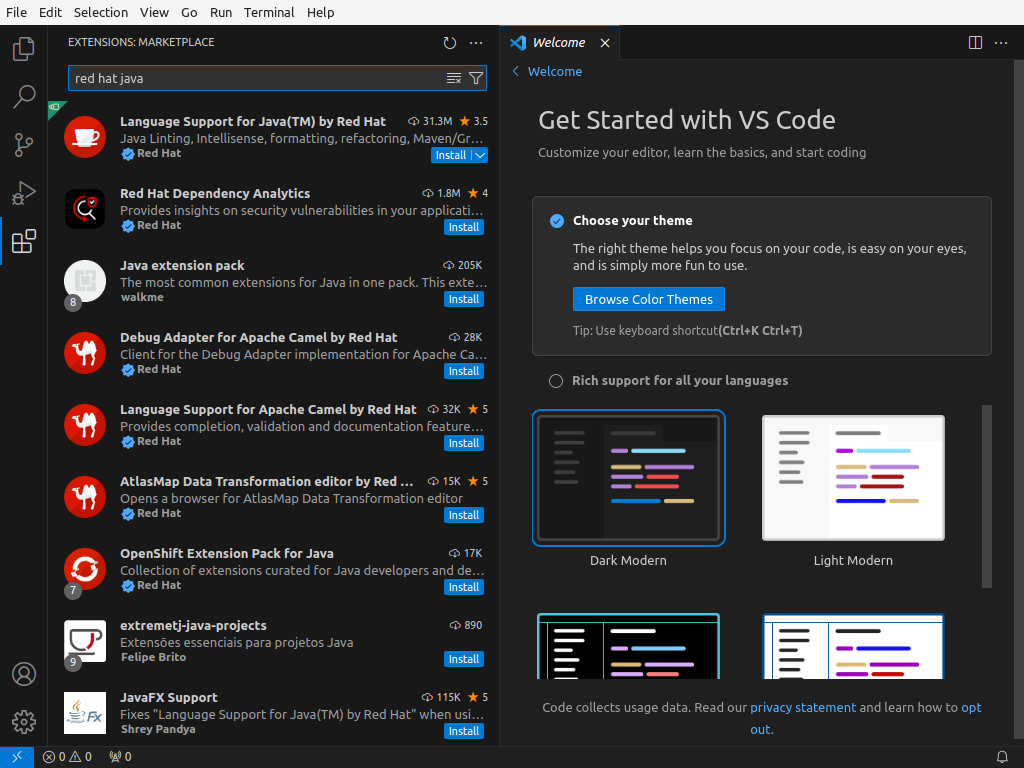
Click the Install button.
If you get a prompt to install additional recommended extensions, just close the prompt without installing.
You should only need to do this step once.
First, open your ~/cs124 folder:
Go to the File menu and choose Open Folder...
The first time you open a folder, you may be prompted as to whether you trust the authors of the files in the folder. If you see this, click "Yes, I trust the authors".
VS Code remembers what folders and files you have open from one launch to the next, so you will likely only need this step the first time you run VS Code, or if you switch to a different folder at some point.
The Explorer tab may open automatically at this point. The
Explorer shows you the contents of the open folder so you can open
files you want to work with, and is visible towards the left in the
picture below. (If you don't see something similar, you can always
open the Explorer tab yourself by clicking on
the ![]() icon in the upper left of
the VS Code window.)
icon in the upper left of
the VS Code window.)
Expand/collapse directories in the Explorer tab by clicking on the little arrows to the left of the directory names.
You can open an existing file for viewing and editing by clicking on it in the Explorer tab. A new editor tab appears, labeled with the filename.
To create a new file, go the File menu, and choose New File... Type the desired file name into the box and press Enter. This pops up Create File dialog box. Verify that the filename you want appears in the Name box at the top of the dialog, and in the dialog navigate to the folder that you want the file to go into and click Create File. A new editor tab labeled with the filename will appear, and the new file will be shown in the display in the Explorer tab.
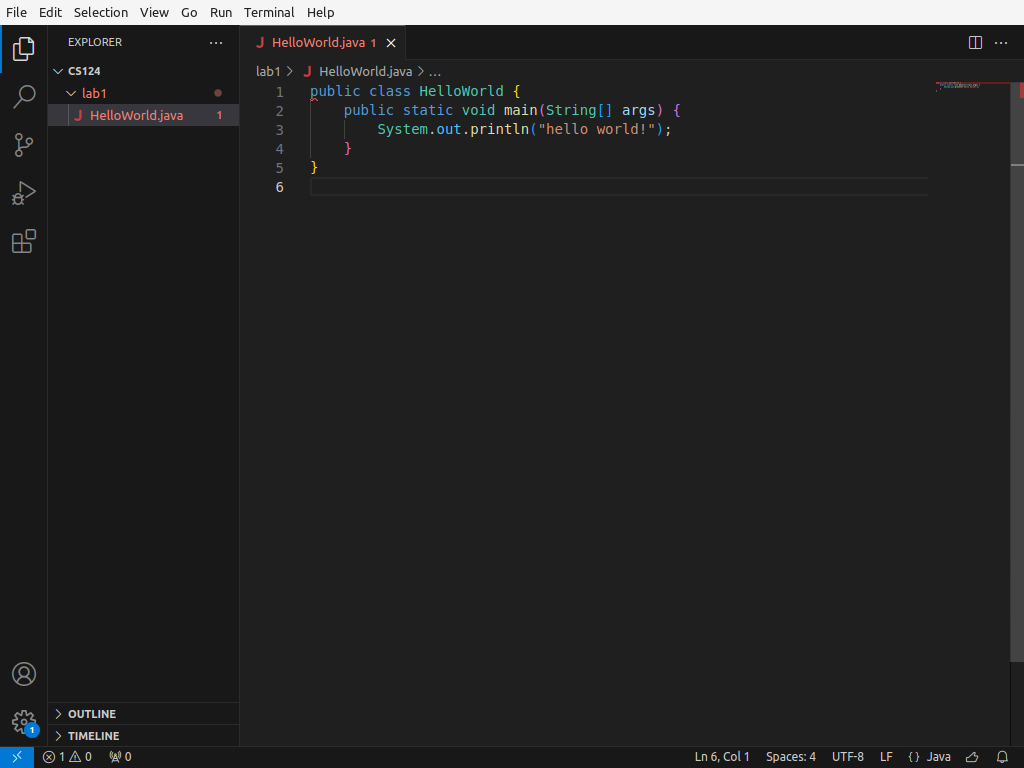
Create a new file called HelloWorld.java in your lab1 folder.
Type the following into the HelloWorld.java tab:
public class HelloWorld {
   public static void main(String[] args) {
      System.out.println("hello world!");
   }
}
Save the file.
Compiling and running the program is done through the command line. Instead of opening a standalone terminal window like you did to change your password, open one within VS Code:
Open a terminal within VS Code:
Go to the Terminal menu and choose New Terminal.
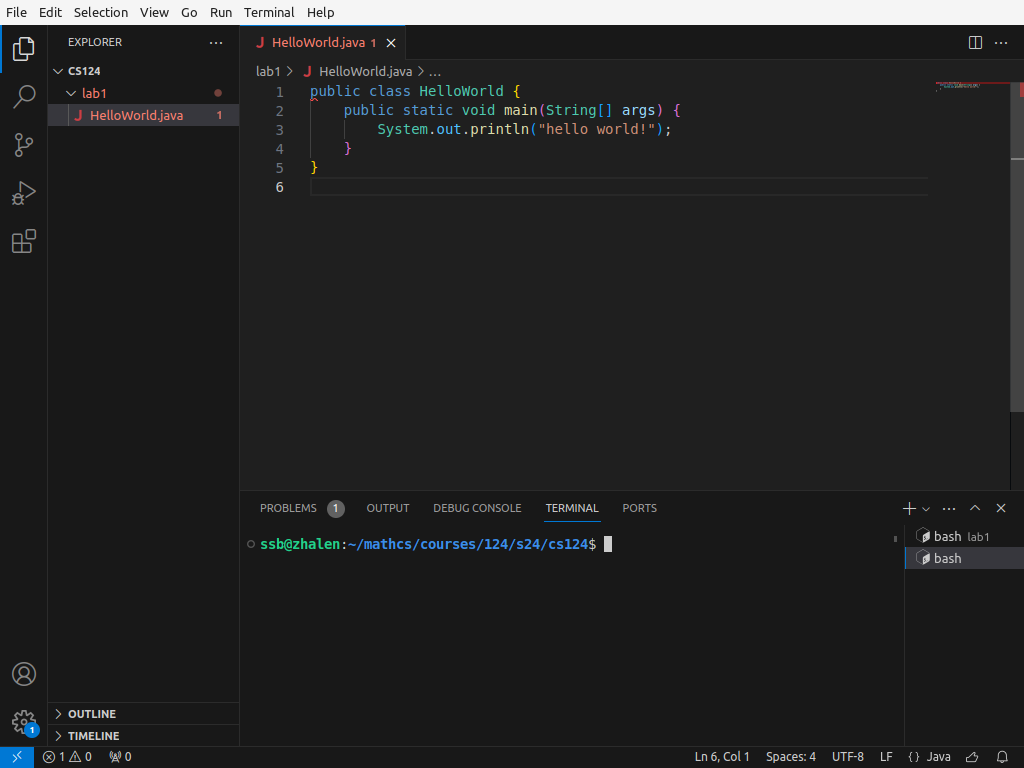
The prompt shows the current working directory. In the picture above, the current working directory is ~/mathcs/courses/cs124/s24/cs124. You will likely see something more like ~/cs124.
In order to compile and run your program, the current working directory needs to be the directory where the Java file is. (In this case, ~/cs124/lab1 because HelloWorld.java is in your lab1 folder.)
In the terminal, cd is the command to change the current working directory - cd .. will change to the directory containing the current working directory (i.e. up one level), and cd dirname will change to the directory dirname within the current working directory.
Make the current working directory ~/cs124/lab1. Most likely this means typing
cd lab1
in the terminal.
Compile the program using the javac command, followed by the name of the program file including the .java extension:
Type
javac HelloWorld.java
in the terminal.
This creates the file HelloWorld.class, which is what you can actually run.
Run the program with the java command, followed by the name of the program (without the .java or .class extension):
Type
java HelloWorld
in the terminal.
You should see the text "hello world!" get printed.
Modify the HelloWorld program so that it now produces the following output when it runs:
  [is this thing on?]
Hello world!
Helloooo....
Make sure your program's output matches what is shown exactly, including the two leading spaces on the first line and the right number of o's and .'s on the third line - if it doesn't, the program doesn't meet the specifications!
Finally, you can auto format your program using the Format Document command:
Go to the View menu and choose Command Palette... or press ctrl-shift-P.
Recently-used commands appear at the top of the list, so if you've used Format Document before, you can just click on it. If you don't see it, start typing "format" into the search box.
You can also invoke auto-format with the shortcut ctrl-shift-I.
Try adding several extra spaces or blank lines somewhere in the program where there is already a space or line break, then run auto-format to see what happens.
Complete the following exercises.
Using Visual Studio Code, create a new file called lab1writeup.txt in your lab1 directory. (Make sure your file is named exactly as directed, lowercase and all.) Put your name at the beginning of the file, and then answer the following questions.
Is it legal to put spaces in filenames in Linux? Is it a good idea? Explain.
For each of the following, give the full path name for the file or directory mentioned. If there is more than one way to write the path (e.g. using shortcuts), give at least one alternative in addition to the full name.
The Using Linux at HWS web site also contains a lot of information about the Linux environment at HWS. Use the "Emergencies" section to answer the following questions: (add the answers to lab1writeup.txt)
If you accidentally delete a file, is there anything you can do to get that file back? Explain.
Rebooting the Lansing lab computers should be avoided if possible because other users might be logged into the system remotely. If a program crashes or the computer freezes, what are two strategies for fixing problems that don't involve rebooting the computer?
Hand in your lab again so that your lab1writeup.txt file gets handed in.
You will not generally be able to finish the lab during the lab period. You can use the computers in Rosenberg 009 (during open lab times in the evenings and on the weekends) and Lansing 310 to complete your lab.
There's not any graded extra credit for this lab, but if you have additional time:
Explore Linux and Cinnamon. Quite a lot about the environment is configurable - you might check out what you can configure under Preferences on the Applications menu. You might also check out what applications are available, or what other information is available in the Using Linux at HWS pages.
Work for this course will be handed in electronically - no need to print anything! Handing in consists of copying your files to a special handin directory that has been set up so that I can access your work for grading.
In the file manager, navigate to the handin directory /classes/cs124/handin and open the folder labeled with your username within the handin directory.
Copy the entire lab1 folder from your cs124 directory (~/cs124) to your handin directory (inside /classes/cs124/handin).
Be sure to copy the right thing - hand in the folder for the lab, not the files contained in that folder or your entire cs124 directory. To check that you handed things in correctly:
In the file manager, navigate to your handin folder.
Look for a single lab1 directory which contains the files HelloWorld.java and lab1writeup.txt. (There may be other files as well; that's OK.)
If you do not see this, fix it!