| CPSC 124 | Introduction to Programming | Spring 2024 |
This lab introduces drawing and animation in JavaFX, making it possible to move beyond purely text-based programs. This is just a small piece of creating full-blown GUIs, but the rest of those elements won't be covered here.
Labs and projects are for practice and learning. While it can be very productive to work on problems with your peers, it is also easy to underestimate how much you yourself understand and can do in such situations — so often something looks easy when someone else does it! With this in mind, you should always make the first attempt on a problem or programming task yourself using only the resources provided for the course (textbook, slides and examples posted on the schedule page, other resources linked on the course webpages). After that point, you are encouraged to come to office hours and/or go to Teaching Fellows. You may not collaboratively write solutions or code, and you may not copy solutions or code written by others, even if you contributed ideas.
You can discuss specific exercises with other students in general terms — such as how you might get started on that problem, or how or when to use various programming constructs, or strategies for debugging — but how to use a particular programming construct to solve a specific problem or debugging a particular program should only be discussed in office hours or with the Teaching Fellows.
Section 3.9.1 in the text outlines several drawing subroutines. In addition, you should be aware of:
If you want to explore further, section 6.2.4 describes additional drawing subroutines, section 6.2.1 addresses creating your own colors, section 6.2.2 addresses using different fonts, and section 6.2.3 addressing loading images. (The material in section 6.2 isn't required, but you can try it out for extra credit.)
There are eight basic colors that you can use: Color.RED, Color.YELLOW, Color.GREEN, Color.CYAN, Color.BLUE, Color.MAGENTA, Color.WHITE, Color.BLACK. JavaFX also has definitions for the color names commonly recognized by web browsers. You can browse those colors and names here. Java's convention is to define them as one word with all caps, so a browser color "lemon chiffon" will be Color.LEMONCHIFFON. You can also browse Java's list here to confirm the recognized names.
Animation means that something changes over time, without any action on the part of the user. Values that change means variables, which will need to be declared, initialized, used, and updated. Strive to use as few variables as possible. For example, single rectangle moving right across the screen would require a variable for the x coordinate, but a car (consisting of two rectangles and two circles) moving right across the screen also only requires one variable — you might define carX to be the position of the front end of the car, and then can write expressions such as carX-80 to specify where the left side of the 80-pixel-wide rectangle used for the car body is.
A full-blown graphical user interface (GUI) is beyond the scope of this course, so the code that you write will fit into one of two provided templates, DrawingStarter.java and AnimationStarter.java, that handle the work of setting up a JavaFX application.
DrawingStarter is for static drawings (no animation). Fill in three pieces, marked by comments:
// *** set title! — what is displayed in the window title bar (change "title" to what is appropriate for your own program)
// *** adjust size! — the size of the program window (change the numbers to what you want)
// *** drawing goes here! — what would be the main program goes here (all drawing, but also anything else your program might do, such as creating and initializing an array for exercise #3)
AnimationStarter is for animations. Fill in five pieces, marked by comments:
// *** set title! and // *** adjust size! are the same as in DrawingStarter
// *** declare animation variables here! — declare the animation variables
// *** initialize animation variables here! — initialize the animation variables defined (where/how do things start out?)
// *** update animation variables here! — animation requires things to change from one frame to the next, so do that update of the animation variables here
// *** draw a frame here!! — do all the drawing for a single frame
JavaFX is not packaged with the standard Java distribution — it must be downloaded separately, and it must be specifically included in the commandlines for compiling and running programs. To make this more convenient, several aliases have been defined: use jfxc and jfx in place of javac and java, respectively. For example:
  jfxc Drawing.java
  jfx Drawing
for the program in #1. If you forget and use javac instead, you'll get a bunch of undefined symbol errors for names like Canvas and Scene.
These aliases work within the department Linux environment (Rosenberg and Lansing) and in the Linux VDI.
Note: Sometimes VS Code tries to be helpful, and adds import statements at the very beginning of your program. This is generally OK to ignore, but if you get error messages about Color and Paint being incompatible, look for the line import java.awt.Color; at the very beginning of your program and delete it.
For all exercises:
Work out positions and sizes of elements in your scene on paper — sketch the scene and label positions and sizes what you know, then work on what you need as illustrated in class.
Utilize incremental development — implement small pieces one-by-one, and run the program to check that things have the positions, sizes, and colors that you want after each piece.
Employ good programming style, including choosing descriptive variable names and autoformatting your code. Use blank lines and comments to group and label drawing elements that are part of the same thing, such as the two rectangles and two circles that make up a car.
Include your name and a description of the program in each program.
Make of copy of the provided DrawingStarter.java file, naming the new program Drawing.
The program should draw an interesting picture as described below.
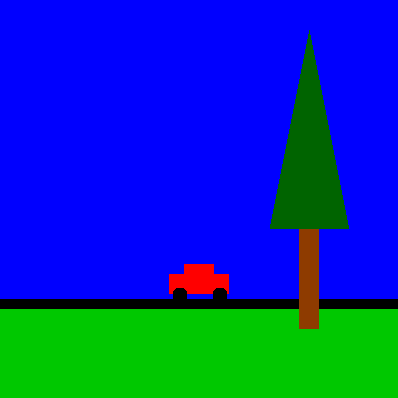
The picture can be anything you want. (You do not need to copy the picture shown, and, in fact, it doesn't fully meet the requirements!) The requirements:
it must be recognizable as a deliberate effort (i.e. you arranged the shapes to form a picture rather than just putting them wherever they happened to end up)
it must be original — re-using elements from examples in class or the textbook won't count towards meeting the requirements (this doesn't mean that you can't include a car, for example, but that if you do, it needs to be substantially different from the one used in the scene in class)
use at least 10 shapes (e.g. drawing two rectangles and one oval counts as three shapes)
use at least 5 different shape-drawing commands (using both the fill and stroke versions of the same shape, such as strokeRect and fillRect, counts as two different shape-drawing commands)
use at least four different drawing colors, including one that isn't one of the basic eight colors (such as Color.LEMONCHIFFON)
use at least two different fill colors, two different stroke colors, and two different line widths
use strokeText or fillText to sign your picture (put your name somewhere in the picture)
the window title should be descriptive of what is in your scene
Extra credit is possible if you create a picture which goes substantially beyond the minimum requirements given, such as a complex picture with lots of shapes or using elements from section 6.2 (such as additional drawing routines, creating RGB colors, utilizing fonts, or including images).
Make of copy of the provided DrawingStarter.java file, naming the new program Pattern.
The program should draw the pattern shown below. Make sure you follow the specifications given below the picture.
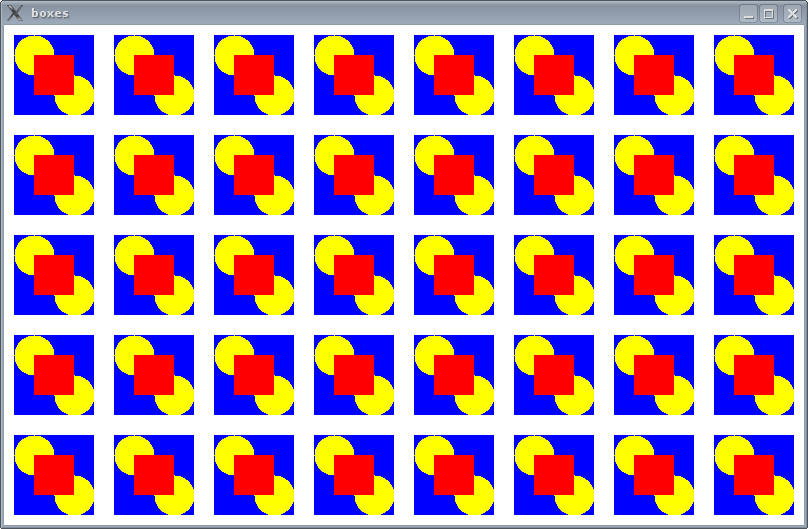
The window title should be "boxes" as in the picture. Make the window 800x500 pixels. The blue squares should be 80 pixels high/wide, and the gaps between the blue squares should be 20 pixels high/wide. The pattern should fill the window no matter the size of the window — don't hardcode a set number of copies of the pattern on each row or in each column. You must use loops fully in order to get credit — copying-and-pasting code repeatedly won't earn you very many points.
Hint: think about how you'll approach this, then highlight to reveal:
Utilize incremental development — start by drawing a row (or column) of the blue squares, then extend that to get a grid of blue squares, then add the other shapes to complete the pattern.
The loop pattern is a combination of the "repeat from a to b with step c" and "repeat as long as / until" patterns — have a loop variable for the position of the current blue square which starts at a and is incremented by c, but have the loop condition reflect the "as long as / until" condition instead of "have reached b".
For extra credit, create a separate program named Illusion which draws one of the illusions found on this page. (Note: not all of the illusions shown are easy to draw with just lines, rectangles, and ovals, but "A bulge", "A beetle", "Roof", "Lips", "Eggs of a moth", "Cushion", "Pressure", "The house of bats", "Frogs", "A checkerflag", "Spreading", "Sakura-yu", "Shielded by bugs", "Octahedron", "Kabuki", "Zabuton", "Persimmons", and "Babaroa" are all possible with varying degrees of difficulty.) An elegant solution is required — loops must be used wherever reasonable, and the code should be reasonably compact.
Programs don't have to only draw pictures — graphics can accompany other computation or tasks that the program is doing.
Make of copy of the provided DrawingStarter.java file, naming the new program BarChart.
The program should be a graphical version of the Histogram program from lab 5 — it should create an array containing 8 random numbers between 0 and 20 (inclusive) to simulate frequency data, then draw a bar chart like the one shown below. The window title should be "bar chart".
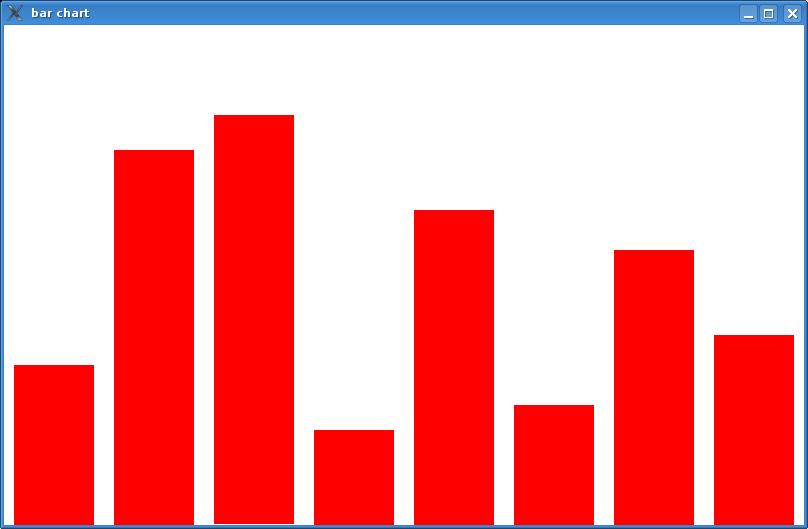
Size the drawing window / scale the dimensions of the bars so that the bars fill the width of the window with a small gap between bars, and so the tallest possible bar — corresponding to a value of 20 — would span the full height of the drawing window. (There's a little math involved here to work out sizes and positions for each bar — sketch out a picture and label the (x,y) coordinates and dimensions for each bar.)
Do the two steps separately — fill the array, then draw the bars — rather than shortcutting and just drawing 8 bars with random height.
All of your code — both setting up the array and drawing the bars — should go under the // *** drawing goes here! comment in the provided template.
Hint: think about how you are going to go through the array and draw the bars, then highlight to reveal:
Combine the "going through every slot of the array" and the "repeat from a to b with step c" loop patterns — one loop variable will be a counter for the array index and the other will be the position of the current bar.
Make of copy of the provided AnimationStarter.java file, naming the new program Animation.
The program should draw an interesting picture involving animation as described below.
The picture can be anything you want. The requirements:
it must be recognizable as a deliberate effort (i.e. you arranged the shapes to form a picture rather than just putting them wherever they happened to end up)
it must be original — re-using elements from examples in class or the textbook won't count towards meeting the requirements, though it is fine to re-use your program from #1 as a starting point
have at least two animated things, one of which must involve multiple shapes which move together (such as in a moving car)
animate both position and size — this can be for different elements (one can move, one can change size) or for the same element (it both moves and changes size)
Extra credit is possible if you go substantially beyond the minimum requirements given. When animating something made up of multiple shapes, use as few animation variables as possible — think of the position or size of the thing as a whole, not of each individual shape. You could also animate something other than position and size, such as color or line thickness.
Don't forget to hand in your work when you are done!
As in lab 2 (and all labs), grading will be based on both functionality and style. Style means following the good programming style conventions outlined in lab 2, as well as producing reasonably compact and elegant solutions. "Reasonably compact and elegant" means that your program is not significantly longer or more complex than it needs to be. In particular, you must use loops when loops are appropriate — achieving repetition by copying-and-pasting a bunch of code will not earn credit.