CS 120, Fall 2014, Lab 3:
Introduction to JavaScript
JavaScript is a programming language that is used to make web pages active. JavaScript code can be incorporated into HTML files, or it can be in separate files that are linked to the HTML files that use it. This lab is a very basic introduction to just a few of the features of JavaScript. You'll learn how to use JavaScript to program what will happen when the user clicks on a button, and you'll learn some of the things that JavaScript can do to a web page. You will also be introduced to the JavaScript Console in the Chrome web browser.
Assignments for this lab are due at the start of next week's lab. The first assignment consists of written (or typed) answers to some questions. Please turn in your answers on paper during the lab next week. (You can turn it in today if you finish.) The second assignment for the lab asks you to create a web page, which should be on the web, in a lab3 folder inside your www folder.
Note on turning in last week's lab2: Please make sure that you have a folder named lab2 inside your www folder. And be sure that you have a file in that folder with a name that ends in ".css". That file should define the general format for your site. I will look for the .css file when I grade your work.
To Start the Lab
To start, copy the folder named lab3 from the directory /classes/cs120 into your www folder. To do that:
- Open a file browser window as usual. Click on "File System" on the left, or click the "Computer" icon in the toolbar and then click the "File System" disk. This shows all the files on the computer.
- Double-click the folder named "classes", then double-click the folder named "cs120". You should see a lab3 folder.
- Right-click the lab3 folder and select "Copy."
- Open your Home folder again, and open your www folder. Right-click in the www window, and select "Paste." A copy of the lab3 folder should appear. (Alternatively, you can drag lab3 from the cs120 folder into your www folder.)
You will work in your copy of the lab3 folder for this lab.
JavaScript and the Console in Chrome
Most Web browsers have "Developer Tools" that are useful to Web site developers. One of the tools is a "JavaScript Console" where you can type in JavaScript commands to see what they do. In Firefox, you can find it under the name "Web Console" in a "Developer" submenu. For Safari, you need to turn on the "Develop" menu in the "Advanced" section of the Safari preferences; then you can select "Show Error Console" from the "Develop" menu. I don't know about Internet Explorer. All the different browsers work a little differently, but look for a prompt where you can type in a command. For this lab, to be definite, we will work with Chrome.
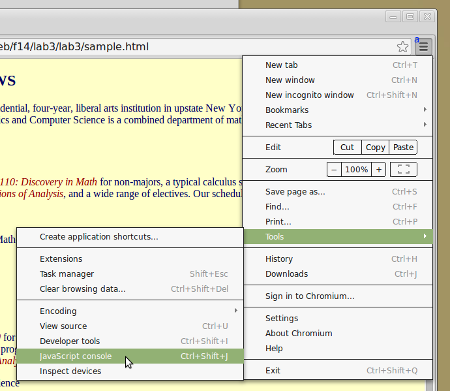
Sign into your Linux account, go into the lab3 folder inside your www folder, and open the file named sample.html in the Chrome browser. (You can right-click the file and select "Open with / Chrome" or drag the file onto a Chrome window.) Click the menu icon, go to the "Tools" submenu and select "JavaScript Console." (Or just hit Control-Shift-J.)
The JavaScript Console appears at the bottom of the browser window. It can be detached into a window of its own, if you want more space. You will see a small ">", which is the prompt where you can type in commands, with a blinking input cursor. (Click in the console, if necessary, to get the cursor so that you can type into the console.)
JavaScript Expressions and Statements
You can type JavaScript expressions into the console. An expression is something that has a value. When you type in an expression, JavaScript will evaluate the expression and show you the value. For example, 2 + 2 is an expression. Type it into the console, and press return to find out the value. Try typing in the expression Math.sqrt(2) (and press return!) to see the value of the square root of two.
You can also type JavaScript commands, which perform some action (and might or might not have a value in addition to the action). Sometimes the action is immediately visible. Try entering this command
alert("Hello World);
This will pop up a dialog box that displays the message, Hello World, to the user. This command is not so useful in the JavaScript console, but it can be useful in JavaScript programs on a web page. You might also try
prompt("What is your name");
Which asks the user a question and gives back whatever the user types as an answer. Note that the value of the prompt command is the answer that you type, and this value is printed in the console.
Note that commands are generally called "statements" in programming, even though their goal is to tell the computer to do something.
Also note that in the console, you can leave out the semicolon at the end of a statement. But when you write JavaScript programs, you should use the semicolon, so I will use it here.
JavaScript Variables and Assignment Statements
A variable in programming is a name that refers to a value. You can give a value to a variable with an assignment statement. For example, type this assignment statement into the console:
x = 2 + 2;
Here, the variable is x. Except for some words that have special meaning, you can make up almost any name for a variable. The "=" sign is the assignment operator. After the "=" comes an expression. JavaScript finds the value of the expression and sets the value of the variable to be the value of the expression. After the above assignment, the value of the variable x is 4. If you just type x into the console, you will see the value 4. If you type x + 3 you will see the value 7.
This is most useful to us here because the value of a variable can refer to an element on the web page that Chrome is displaying. There are several ways to get a reference to an element. The only one we will look at here is document.getElementById. Type the following expression into the console. (You should still be viewing sample.html in Chrome!)
document.getElementById("content")
JavaScript will show you the (source code for the) <body> element. You will notice that it says, <body class="normal" id="content">. The expression document.getElementById("xxx") gets a reference to the element that has id="xxx". (If there is no such element, the value is null, which is a way of saying that no such element exists.)
Notice that the <body> has class="normal". In JavaScript, the class can be referred to as
document.getElementById("content").className
Try typing it in! This is really just a very long variable whose value is the class. Now for the cool part: You can actually change the value of this variable, and it will change the appearance of the web page in the browser window to match the new value. Use an assignment statement to change the value, as follows. (Hint: Press the up-arrow in the console to get back previous commands.)
document.getElementById("content").className = "alternate";
This changes the appearance dramatically! To see where the new style comes from, look at the source code in sample.html. You will see that it defines styles for class name "alternate" as well as for class name "content". If you say
document.getElementById("content").className = "foo";
the page will revert to the default style because there are no style rules for class "foo".
Now, to get back to variables, instead of writing out a very long name like document.getElementById("content") over and over, you can store the value in a variable. For example:
bd = document.getElementById("content");
Then you can just write bd instead of document.getElementById("content"). For example, to change the class for the <body> back to "normal", you can just say:
bd.className = "normal";
(One more thing to note: You are not changing the original HTML source file sample.html here. You are only changing the page as it has been loaded into the browser.)
More Web Page Manipulation
Let's look at some more changes that you can make to a web page using JavaScript assignment statements. For one thing, you can change the entire content inside an element by assigning to its innerHTML. For example, the JavaScript command
document.getElementById("mainhead").innerHTML = "Hello World!";
will change the top headline on the page to show the text Hello World. Try it! This works because the top headline is given by the element that has id="mainhead". Alternatively, you could make a variable to refer to the element and use the variable in the assignment statement:
headln = document.getElementById("mainhead");
headln.innerHTML = "Hello World!";
There is am <img> element at the bottom of the page that shows a picture of Professor John Vaughn. The <img> element has id="facpic". To make it show a picture of Professor Yan Hao instead, you can change the src property of the element:
pic = document.getElementById("facpic");
pic.src = "http://math.hws.edu/web/faculty/hao.jpg";
You can change the size of the displayed image with
pic.width = 300;
And you could say document.getElementById("facname").innerHTML = "Yan Hao" to make the name above the picture match the new picture. Why does this work?
It is also possible to change style properties of elements. For example, to change the color of the main headline to red and the font size to be 50px:
document.getElementById("mainhead").style.color = "red";
document.getElementById("mainhead").style.fontSize = "50px";
Here is how this works: On the left side of the "=", you need the element followed by .style followed by another period and the CSS property name. For property names that have hyphens in them, such as font-size or background-image, You have to leave out the hyphen and capitalize the next word: fontSize or backgroundImage. (This is because names in JavaScript can't contain hyphens.) On the right side of the "=" is the new value for the style property. It should be enclosed in quotes, and inside the quotes you should have the value just like it would appear in a CSS rule. As usual on the Web, either single or double quotes can be used. For a few more examples,
document.getElementById('content').style.fontFamily = 'monospace';
document.getElementById("cs441").style.textDecoration = "line-through";
document.getElementById("content").style.backgroundImage = "url(brick.png)";
(The file brick.png from coolpatterns.net is in the lab3 folder along with sample.html.)
Assignment 1: JavaScript Console Exercises
This is the first of two assignments to be turned in for this lab. For your first assignment, you will do a few short exercises in the JavaScript Console in Chrome. Each exercise asks you to use one or more JavaScript commands to accomplish some task. You should type the commands into the console to make sure that they work. Also record your answers on paper or in a text document that you can print out. You should turn in your answers on paper in lab next week. (Turn them in this week if you finish.)
Here are the exercises. Before you begin, you should reload the sample file, sample.html, so you can start with a fresh page. To do the exercises, you will need to consult the HTML source code for that page. You might need to look up some things that we have not covered in class, either in the textbook or on w3schools.com.
- What command will center the main heading on the page?
- The name of CPSC 120 is egregiously misspelled. It says "CPSC 120: Principals of Computer Science". It should say "CPSC 120: Principles of Computer Science." What JavaScript command can be used to fix the problem?
- The first paragraph of the page contains the name of the school (with id="school"). Without using a variable, what commands will show the school name in white text on a blue background and in bold?
- The first paragraph of the page also contains the name of the department (with id="dept"). Using a variable to shorten the typing, what commands will show the department name in white text on a blue background and in bold?
- You can make an element entirely invisible by setting the value of its display style property to "none". Based on that information, what command will make the math section of the page invisible?
- The entire computer science section of the page is in a <div> element with id="cs". What commands will show this section with: a light yellow background color, a thick red border, and a 2cm margin on the left?
Functions and Active Buttons
This is all well and good, but you don't want the users of your page to have to type in JavaScript!! How can you make a web page active by including JavaScript commands in the HTML source itself, and what will the user have to do to execute those commands? One of the simplest ways is to use a <button> element. A <button> element adds a clickable button to the page. A <button> can have an onclick attribute. The value of the onclick attribute consists of JavaScript code. The JavaScript code is executed whenever the user clicks the button. Usually, the code is a function call. For example,
<button onclick="doClick()">Click Me!</button>
Here, the function call is doClick(). A function is a set of commands that have been given a name. (It is like a variable, but whereas a variable names a value, a function names a series of commands.) When the function is called, JavaScript executes the commands. To call a function, you need to have parentheses after the name. To define a function, you need some JavaScript code such as
function doClick() {
    alert("Thanks for clicking!");
}
You could actually type this into the JavaScript Console, all on one line, and then call the function by saying doClick(). But we want the function definition to be on a web page so that we can call it with a button. You can define your functions in a <script> element anywhere in the HTML source for the page. A common place to put it is near the end, after the <body> element. It would look like this:
<script>
    function doClick() {
        alert("Thanks for clicking!");
    }
</script>
You can define as many functions as you want in one script.
So, you have to add a button at one place on your page, and you have to add a script with a function definition at some other place on the page. What links them together is that the name of the function is used in the button's onclick attribute.
Open the file sample-with-buttons.html in a web browser. This page has several buttons and functions for those buttons to run. Try them out, then look at the HTML source code for the page. You will find the <button> elements near the top of the page and the <script> containing the function definitions near the bottom. Each button has been programmed to make a change to the page, using the same JavaScript commands that you have learned how to use in the console.
Assignment 2: Your First Interactive Web Page
For the second assignment, you will work on an HTML source file using the gedit text editor. The page will include some buttons and a script to define the associated functions. Save your file in the lab3 folder inside your www folder. I will look for it there! You will want to copy some ideas from sample-with-buttons.html.
For your second assignment, you should create a short, complete web page. The web page is a very simple "slide show." It will display one image, and it will have several buttons. Clicking on any one of the buttons will replace the image with a different image. Each button should bring up a different image. Furthermore, there should be a caption under the image, and and when you click a button, the caption as well as the image should be changed. I suggest that you put the image and the caption in separate paragraphs and that you center those paragraphs. To make the slide show work nicely, all the images should be the same size or should at least be displayed with the same width and height in the <img> element. Be sure that you understand that the page will only display one image at a time and it will only have one <img> image element. When a button is clicked, the src of the image element needs to be changed.
You can use images from the folder nature-pics in the lab3 folder, but you are not required to do so. You might prefer to find some images on your own or maybe use some of your images from Lab 1.
To complete the page, it would be nice to have one more button that changes some styles on the page. Maybe the button can say "Make this page prettier".